Let the Beauty of what you Love be what you Do...
~Rumi
Showing posts with label testing clay bodies. Show all posts

Saturday, April 13, 2013

Obsessed with Clay, my Crazy-busy Life & other Updates... :)

Oh where to start? Well, with clay of course! I've been spending 30-40 hours a week in the studio trying to get things accomplished as the end of the semester is quickly approaching. In addition, I'm working just enough to almost make ends meet, which takes up any "spare time" I might have... and does not leave any financial room for things like computer hard drives crashing (yes it did!) and various other unexpected expenses... but I digress! I just got a couple of new pieces out of the kiln last week, & you know I'm pretty excited about that!!!
 :)
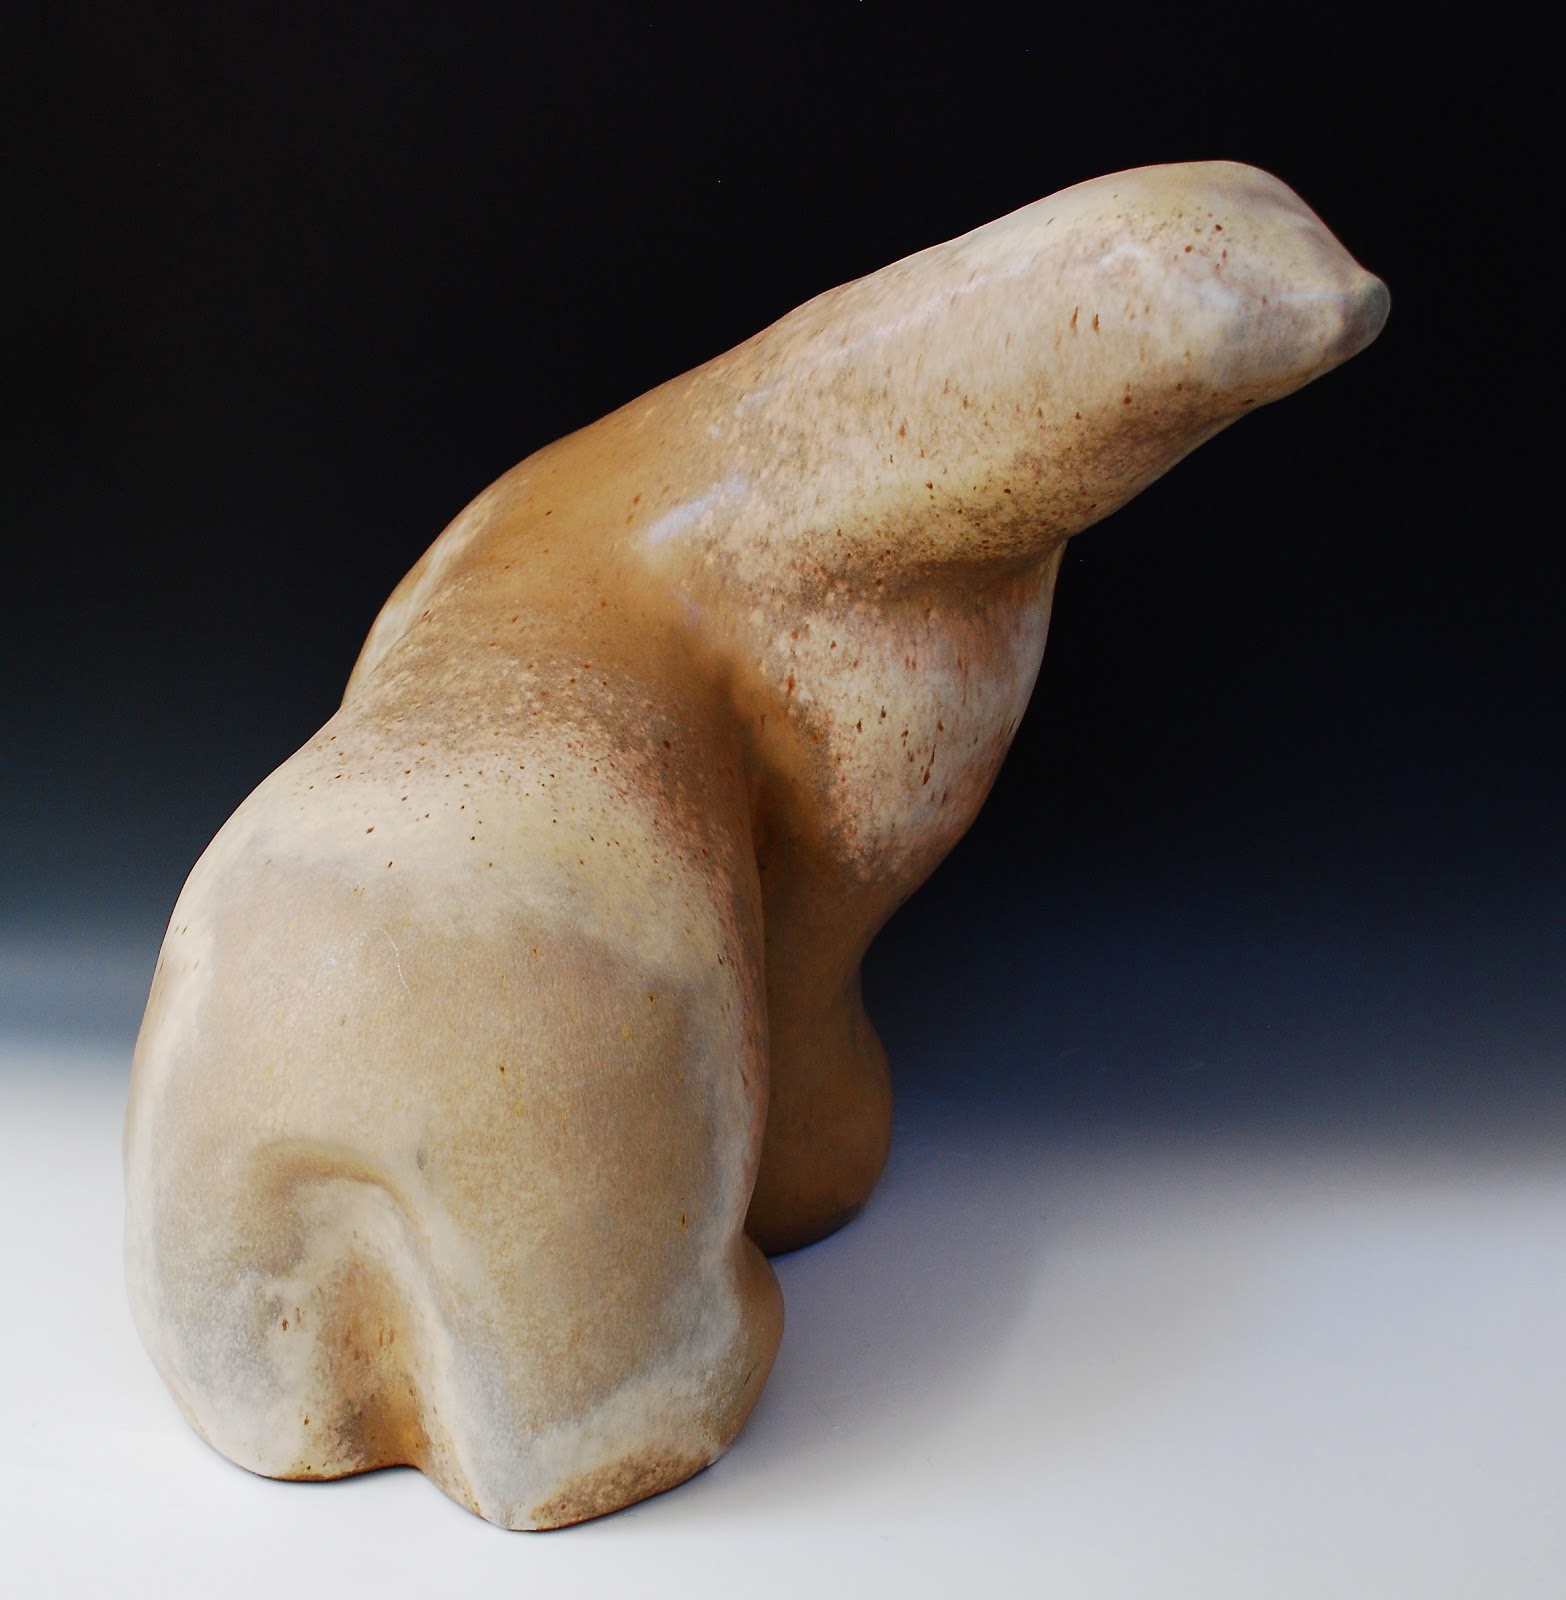
 If you recall, I'm testing several clay bodies this semester to see how they hold up in the soda kiln with the larger bear sculptures.

#4 Soldate 60 Cone 10 Clay Body- Salt Fired to Cone 11
Satin Mint Modified Glaze
H: 15"   W: 10"   L :19"

The good news is no cracking so far~ yahoo!!! Above is number 4 in this semester's series. I was happy to see the break in glaze across the nose that I had missed in the first 2 pieces fired. Below are few other angles.


I am pleased not only with the fact that (knock on wood!)  none of the new clay bodies I've tried thus far have cracked with the larger sculptures, but given the unpredictability of firing in the soda kiln & the effects of this glaze on various clay bodies, I am actually also quite pleased with effects of each one. In hindsight I realize what a rather gutsy move it was to apply glaze to larger forms without first making an actual small test tile for each clay body. My theory really, was that there are so many different colors & textures in this one particular glaze, that had I done test tiles, and maybe only seen one funky brown color, I may have disregarded that clay body totally, without having been able to see the glaze effects & the fluidity on a larger piece.
So, you see, there is a method to my madness!

 #3 Big White Cone 5-10 Clay Body~ Salt Fired to Cone 11
Satin Mint Modified Glaze
H: 16"  W:17"  L 14.5"

Above is number 3 in this semester's series. It's funny... now that I've been making these forms for awhile, you'd think I'd have it down pat... but no! I still struggle with which way I want the head to go, and how to make it work as I move along. Sometimes it looks good to me from one angle, but not as much from another. The neck may seem to thin, or  maybe pointed at an odd angle, but I don't often see this as I am moving along... so it's a continual conversation between what's going on in my head, how that translates to my hands, and quite frankly at times I think the clay has a mind of it's own! I like this piece alright, but it is not my favorite. Below are few different angles.


It got just a touch of crystallization on the nose & on shoulder... I love that effect!


Which brings us to where I am now. Below is number 9 in the drying state. After I had built several bears with different clay bodies, I went back to the Ann's Soda... the clay body that I had originally started with & had problems with cracking. This one looked fine until a few days into the drying process...


then this happened!


A closer view~ YIKES!!!


I am trying to fix this with a product called "magic mender" for greenware... I just loaded him into the bisque today & will find out monday how it works. I'm keeping my fingers crossed, because typically if it has a crack before it is even fired... that spells trouble when it goes into the abusive soda kiln environment which generally fires to cone 11!
Number 7 & 8 (both of which were also Ann's Soda) have been bisqued, & unfortunately one of them developed a small crack as well. Bummer! I just have not had luck with that clay body on larger works, despite my increase in drying time this semester, as well as larger vent holes & slow bisque fire. I am kind of kicking myself in the butt for going back to this clay, but I needed to keep building to keep on schedule, and not knowing how the others would turn out, it was my fall back of sorts. I'm trying another Magic Mender product for high fire... I just glazed both 7 & 8 today & hopefully they'll be fired in the next couple of weeks. 


I had used 6 different clays for 6 different bears, 3 with Ann's & then decided to add one more clay body test! Above is number 10 just after I finished him. 


I used Laguna Dark Brown cone 10 for this one... the clay was an absolute joy to work with, and breaking the potter's rule, I have once again fallen in love with greenware- I love this guy! So far he's drying just fine.
In the meantime, I've been mixing glaze... loading & unloading kilns... sanding glaze drips off the bottom of finished pieces, you know, the usual. In addition, I am looking for a new place yet again. I had planned on moving at the end of December, as the place I was in sold... but they let me stay on month to month until now. I knew they were planning on remodeling sometime this spring... but was hoping it'd be after the semester ended! I have 2 more weeks left until I have to move & have not yet found an affordable place that fits my needs. So, needless to say, with clay, work, & moving, it will be a busy couple of weeks to say the least! 
Wish Me Luck!
:)


Wednesday, March 20, 2013

First Results of the Spring Semester!

Just got my first results of the semester out of the kiln~ YAY! Though I've been working obsessively in the studio for the past 2 months, it takes awhile to see the results. While I am fine with that, & have developed some level of patience with the process, it has been a struggle to explain this process to my Studio Practice instructor. You see, in order to have the studio space, I must take the "Studio Practice" Class, which is a combo of all artistic disciplines, including drawing, painting, printmaking & sculpture. While some students in my class can work for a few hours & have a "finished piece of artwork," my pieces take 15- 25 hours to build. Then, assuming there is no cracking in the initial drying phase (which, if you recall, I am drying very slowly over 2-3 weeks, in hopes of alleviating the cracking issues I had when going larger last semester) the pieces must be bisqued, which, depending on how full the kilns are, can take another week. My glaze must be mixed, sprayed on meticulously in the spray booth, wadding applied so the piece won't adhere to the shelf... then comes the wait in line to fire the pieces.


Our soda kiln is small, and there are somewhere around 7 or so classes that are putting work in it. I took the photo above to show my Studio Practice instructor the size of the kiln in relation to my work. Due to the size of my pieces in relation to others, and the space they take up in the kiln, my work was bumped back several firings. While I understand this, despite my best efforts to explain the ceramic process to my non-ceramic instructor, it was indicated that excuses were being made as to why the ceramics students did not have finished work to show. Now, knowing me & my ceramic obsession... don't you think I want to see finished work as well?? Of course! But I can appreciate the process, and all the factors involved in ceramics, (especially the firing) that as a student, are beyond my control.


Glazed work, in cue for loading.


Fully loaded kiln. I was lucky enough to get 3 pieces in this firing. You can see how much space they take up! In addition to all the time- consuming factors listed above, it must be noted that in our student clay community, we all pitch in & help out.  That means that  loading & unloading kilns is part of the process... which I think is great, but this takes time as well. There are so many considerations to take into account when working in clay... and I feel that to compare the processes in clay to other artistic processes in the student setting is like comparing apples to oranges. But, if any of us are to have our own studio one day, learning the in's & out's of the entire process is  both beneficial & essential. 
Anyhow, drum roll please... 
my long awaited Finished Work!!
:)


#1 New Mexico Super Sculpt Cone 10 Clay Body; Soda Fired to Cone 11
Satin Mint Modified Glaze
Dimensions~ H: 16.5"  W:16"  L 16"

As you may recall, my goals for this semester were to complete a series of 10 or so bears, testing a variety of different sculptural clay bodies, to see which I liked working with, which held up to the firing in the Soda Kiln without cracking issues, and how my particular glaze worked with these bodies. (Essentially, these are large scale test tiles!) I was thrilled with the results!! Firstly, no cracking!! Yay! Secondly, while the glaze turned out quite a bit differently on these clay bodies as I was sure they would, I was quite excited about the effects on each. 
:)


While no crystallization occurred on this piece, I am still quite in love with this glaze I find the variation of color nothing short of astounding!
(Click to enlarge on any photo to see glaze detail.)


While the goal of some ceramicists is to attain fairly predictable results, I am loving the uncertainty and different effects attained by testing different clay bodies with the same glaze to see how they react to the atmosphere in the soda kiln. I love the light rose colored tones in this one, which occurred on the back & neck of this piece.


Below is piece # 2. Just a touch of crystallization on the nose & different reactions with the clay body create a totally different effect. I like the inquisitive posture on this one.

# 2 Laguna Sculpture Cone 10 Clay Body; Soda Fired to Cone 11
Satin Mint Modified Glaze
Dimensions~ H: 16"  W: 17" L: 17.5"

Another view~


The piece below was actually built last semester. It was the largest one I had done with the Ann's Soda clay body... I was afraid to fire it as my larger pieces w/ that particular clay body had been cracking in the kiln, but I decided to go for it.  While some cracking did occur on this piece, it was fairly minimal. It was too tall to fit on my photo background paper, so please excuse the amateur photography on the finished piece.

Ann's Soda Cone 10 Clay Body; Soda Fired to Cone 11
Satin Mint Modified Glaze
Dimensions~ H: 21" W: 15" L: 17.5 "

Again, I am in glaze-amazement. The effects turned out much more subtle in this piece. the surface is very stone-like, in person it has the feel of smooth walls of granite.


 Above & below~ a few more views. 


I've dubbed this one "The Guardian." He's much taller than the others (close to 2 feet) & has a presence/feel as if he is watching over them.


Above is our glaze room & spray booth. Just before spring break, I got 2 more pieces glazed, so that hopefully I be able to load them up as soon as classes start up again.


I also finished # 7 above, and # 8 below. Having built 6 bears w/ a variety of different clay bodies, I returned to the Ann's Soda on these two.


And lastly, my messy studio just before campus closed for the week~ I'm running out of space!


My reflections on my coursework thus far this semester are positive, despite the ongoing struggles with the Studio Practice class. While I don't feel I am learning much from the actual class, I am learning a lot by working independently in the studio, testing clay bodies & by creating a cohesive body of work.
✫☼✫
Hopefully I'll have more work to post in the upcoming weeks, but in the meantime...
Wishing you all a very Happy Spring Season!!
☺