Let the Beauty of what you Love be what you Do...
~Rumi

Saturday, February 25, 2012

What I've been up to... a little Clay this & that.

Got an email from a friend of mine the other day, telling me to get to work... not the work kind of work, but you know, the clay kind of work. Well as usual, I am trying still trying to find the balance between the work that keeps a roof over my head & food on the table, and the work I'd love to be doing pretty much all the time... the clay work. So here's what I've been up to~
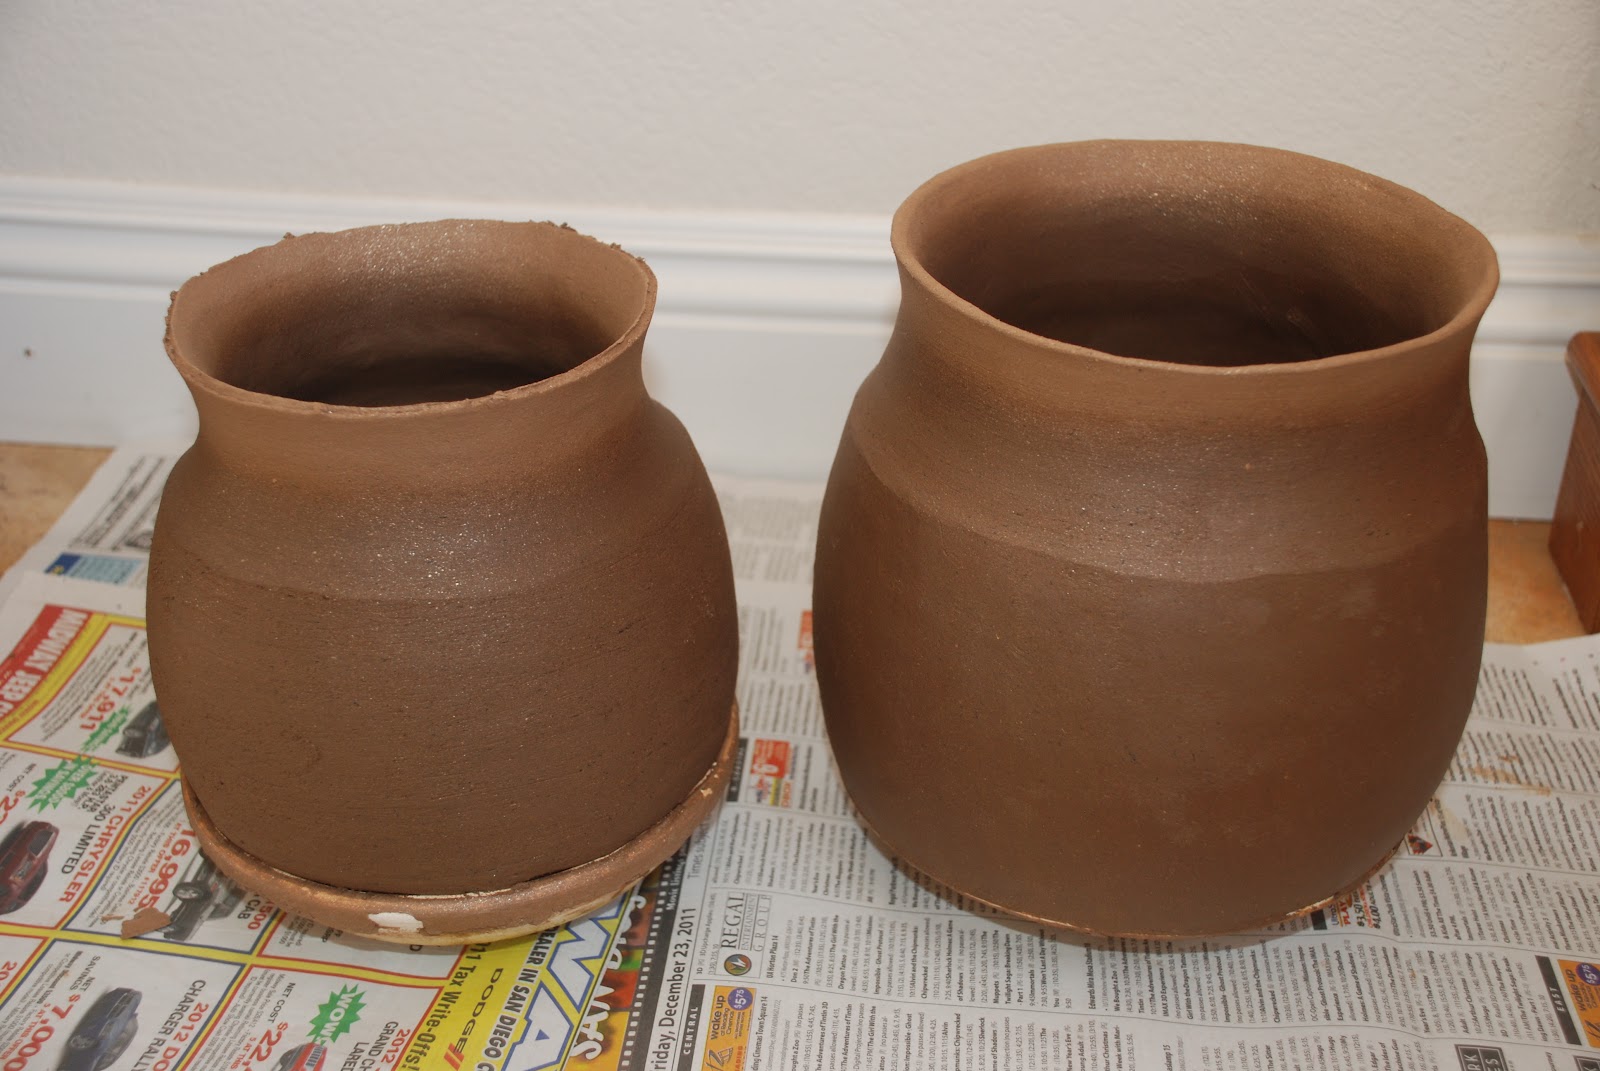
Working on bowls in my Wheel Throwing class... which seems to be going painfully slow.   Some people are naturals at this, but for me, I can throw & throw & throw and still it seems I can't reach any level of consistency in my work. Yeah, I can sit down, center a piece & make a bowl... but can I repeat that process to make, say, several identical pieces? Uh, that would be a no, Bob. I think part of the problem is that I just don't have a lot of time to get in there out of class time. Perhaps if I had the time to spend, and could sit down day after day after day... I'd finally get it. 


But let's just say for now, that I'll probably never make it as a production potter. 
:|


Moving on~ Glaze Formulation! This class is just a little bit over my head, but I'm soaking in what I can, and I have to say I find it all very interesting. Below are results from our first test tiles. (Kinda crummy pics, but click to enlarge for a bit better detail.)


What I found particularly interesting about these first tests is that our glazes were made solely of 2 ingredients. A natural clay body found semi- locally & a flux. (The flux is what helps to melt the glaze.) That's right folks! A clay & a flux mixed together & fired makes a glaze! How amazing is that? Learning something new everyday I tell ya. And to think, before this class, I was just using glazes with really no idea as to what really makes them work. 


Mixing certain percentages of clay & flux results in totally different glaze effects. Pretty cool if I do say so myself. We took a vote on our favorite glaze from the tests above, and then began to add color to do a line test in different percentages to achieve different variations. These are unfired, so of course they will look totally different when they come out of the kiln.


Everyone tested a different color addition & in various increments, so I'm sure we'll have some interesting results!


I've also been working on some more bear sculptures at home... still trying to find the one that works. This one didn't.
:(


As usual, I could see the finished result in my head, but there seems to be quite a disconnect going on between idea & result.  I thought adding a bit of texture might help. It didn't.
:(
So I took it to school today & threw it in the recycle bucket...


and went back to my earlier, simpler form of bear, and was much happier with the result, plus they're just fun to make... and let's face it~ fun is good!
:)


I also got my larger bear out of the kitchen & onto my shelf at school today. He did fine riding across town in my trunk. 
:)


Oooops, how'd these get in here? 


No, I have not gotten my good camera back yet~ not for another week or two (aaarrrgh!) but luckily I had my little point & shoot w/ me the other evening to capture this awesome display of super-cloud-coolness. 
I believe this formation to be the Stratocumulous Undulatus, though it is possible it could be Altocumulous Undulatus. (No, I can't identify all clouds by their scientific names... but this was so cool I had to look it up!)


One last thing- this was posted on the SFCC Clay Club facebook page & it resounded w/ me. It's a good read for those creative types that think that perhaps their work is not quite coming along quickly enough. ( Who, me?) Give it a read if you are so inclined.


:)


Wednesday, February 15, 2012

Practice, Practice...

 I haven't tried a larger piece of work for a while since I've mainly been working on throwing & glaze calc in class, but I had the day off yesterday, so I figured I'd have another go at it. After watching some videos online, I decided the best way to go about it would be to coil build rather than slab work as I had done before. Here are some pics of the process~


It was all going quite well until this point- until I got to the head. I always have such trouble with the head on larger pieces. I don't know exactly why this is. In my mind's eye, I can see where I want to go, but it just doesn't translate from my mind to my hands to the clay. Total time spent on this piece was about 11 hours. At least 1/2 of that time was spent on the neck & head, as I added & subtracted features & texture.


It was getting late & I still had a lot of clean-up to do to get my kitchen cleaned up & in functional order, so rather than tear the head apart again, I decided to call it good at this point.


I'm actually not even sure whether or not I'll fire this guy, or put him in the recycle bucket. He's about 2 feet long & 10 inches high, and I'm not sure how my instructors will respond to me wanting to take up so much kiln space since I'm not taking a sculptural class this semester. Also, I built him w/ a clay body better suited to throwing... it's a softer clay w/ less grog, and I am not sure how it would hold up. I do, however, want to continue making these sculptures this semester, though I plan on going about 1/2 this size... I want to keep practicing until I get something I really like so that when I formulate a really cool glaze in my glaze calculation class I can create a truly unique piece.

Wednesday, February 8, 2012

My Clay Station Kitchen & Makin' Pots w/ Mom

Trying to get a little "umph" back for blogging. Sure, I've still been photo documenting this whole time... just have other things going on & blogging has been placed on the back burner. Like anything else, blogging takes time, and as of late, that is something I feel perpetually short of!  But, since I originally started this blog to document progress (or, at times, lack thereof) through my artistic journey, I figure I'd better make a more concerted effort to continue... though I have to admit, postings & visits to other blogs may be a bit sporadic.
I knew you'd understand.
:)
Someone had asked about my setting up a clay station in the Kitchen- well obviously it is not the best choice- It is quite messy & can be quite a pain in the **s if I decide to get hungry & try to do anything crazy... like, you know, cook in the kitchen. But, for now, my options are somewhat limited, so I do the best I can w/ what I've got.
Below~ settin' up the station & getting to work on Micaceous Pots. I don't have that particular class this semester, but I gotta make them!


I do love hand coiling pots- it's a lot of work for sure, but I always am amazed when it really starts to look pot-like.
:)


At the point it begins to have a decent shape (though I probably could have done a bit better job on this one) I let it set up a few hours before adding the rim so I don't end up squatting my pot down... which I have been know to do on several occasions.


I added several more coils, because knowing me, I'd have to cut the rim a few times to get it fairly straight. The rim is a huge challenge!


At this point- I called it good & set it off to dry as I was getting ready to head off to San Diego to see the family. It just so happens that it was my Mom's birthday when I was visiting in January, and you know that the perfect gift for anyone on my list is a little something clay related. :) Since mom is extra special & has taken quite a liking to clay, in addition to giving her one of my favorite bowls from my last class... I got her a turnstile, tools... and you guessed it... a big ol bag of clay. (Because, really, who doesn't want mud for their birthday?!)
She was able to get a couple of days off work, and we had a pot building extravaganza!
:)


Our first pots taking shape. Dang it- I forgot to take pics of them when the rim was added! Arrgh! Anyhow, looking at the mess we created below, you can certainly see how much more prudent it is to do in the garage rather than the kitchen, but I digress.


Below is our second set of pots. Mom's on the right (wow, way to go, Mom!)
& mine on the left. I was pretty excited about that one, mainly because I was using a Puki that I had made in my last wheel throwing class for the base.


Water scraping pots---


Pots in the sun after water scraping.


That's as far as we got, since my visit was a short one. I think this is kinda the ugliest stage of the process for the pots, but I love them anyway. Once they are sanded, slip is applied & they're polished, they will take on a whole new (& hopefully beautiful) look. I hope to get these finished in the next few weeks, as well as another casserole I'm working on, but in the meantime I've started a couple more classes- Wheel Throwing II & Glaze Formulation- pretty fun & challenging so far... but won't really have anything to show for quite some time and wouldn't ya know it, my beloved digital SLR just went on the blink & is expected to be at the camera doc's for the next several weeks... so no photography either... unless it is of the point & shoot low resolution variety... :(
Not looking forward to that bill! Especially since I have been trying to work less & clay more, which has been a tough balancing act, to say the least. I keep telling people, "Once I get caught up, then I can live paycheck to paycheck!" Ah, the price of pursuing my artistic dreams....
:)