Let the Beauty of what you Love be what you Do...
~Rumi

Friday, May 27, 2011

Just a few pots from the end of the semester~ and in case you were wondering Potsplosions do happen!


Just showing a couple of finished pots from the end of the semester in my Micaceous Clay class~

Bean Pot

Large Salad Bowl

Salad Bowl~ Aerial View :)

Casserole Dish- Bisqued, but not Smoke Fired yet~ kinda funky handle!


And last but not least- just to show that Potsplosions do happen! And yes, that just happens to be my pot!  Now, I've seen pots crack... but I've never seen anything like this where the pot literally pulverizes... have you?!? I do have some theories (air bubble, clay not completely dry on the inside) but still I've never seen something quite like this. It made for some serious kiln vacuuming! All in all though, I've had a really good semester. There were a few issues with the commercial clay I was using (some trouble with the slip bubbling & popping off with testing the final pots on the stovetop, and some issues w/ fragility.) But the commercial clay company had switched the source & recipe... though I have heard they are switching back to the previous clay which I have used before without difficulty. Another remedy for next semester (YES! I am taking this class again!) is that I will try to use only natural clay, hand dug in the mountains of Northern New Mexico. It's a lot more pricey $100 per 50 pounds vs $16 for the commercial, but I think the pay off will be worth it! I do have one more project I was working on when the semester ended ( a larger wolf pup sculpture) but I didn't get a chance to fire it, though I am hoping to do so when the summer semester starts~ even though I won't be able to take classes this summer. Wish me luck & hope for no explosions~ I have had it sitting in my living room for the past week & have grown quite attached to it! Now that the semester has ended, I am back to working like crazy &  my family is visiting soon, so I'll be quite busy, but I'll post & visit when I can! Happy Summer, Everyone, & thanks for stopping by!
:)

Sunday, May 22, 2011

Raku Number Two!

I know I said I was going to try to take more photos of the the Raku process, but I was really focused on scraping & sanding my last 2 pots so I could get them in the kiln before our semester ended- so I missed the photo-op! Out of the four pieces that were Raku fired, these were my two favorites. You may remember these- I started them 6 weeks ago! It is such a joy to see them in their finished state! I've taken several pictures of the bear pot from different angles to show all the differences in surface color & pattern made by the firing process.
(Click to enlarge for better detail.)


Here's my 2nd favorite pot from this firing.


I have to say, I am in love with this process! The first firing we did (from the last post) the pieces came out an iridescent silver/black which I loved, but while these pieces have some of those components, they also retained patterns of the deep orangey brown color seen in the traditionally pit fired pots. I can't decide which process I like better, but I can tell you I will be experimenting more with Raku in the future! 
:)

Thursday, May 19, 2011

My First Raku Firing... Whooo Hoooo!!!

You may recall me talking about a possible Raku firing for my Micaceous clay class (click here.) When I heard about the possible results for this process (a silver/black iridescent finish) I had in mind the 3 little wolf pups & the mini bean pot. It was a fun process & I was super excited about the results! Here they are~

Good Things Come in Three's


I totally love them!


Wolf Pup Meeting

So, you know me~ I got a little carried away with photographing them!
:)

Taking Time to Contemplate the Little Things

I couldn't help it, they're just so darn cute!


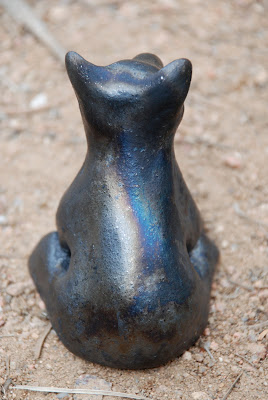
The backside shows the random iridescent pattern made by the firing.


Here's the mini bean pot. I can't help but love it, too! The random patterns combined with the shape make me think of viewing the earth from space.


A little close up of the patterning. In case you're not familiar w/Raku (which I was not) I'll give a a very brief synopsis. After the pieces are bisqued, they are put in the Raku (gas) kiln & fired very hot, very fast. My understanding is that there are a few different ways to go about it, but in this case the pieces were then moved carefully w/ long metal tongs & thrown into a steel can with sawdust. The sawdust immediately goes up in flames, the lid is closed & the sawdust burns down & then the pots are ready to come out.


My hot pot, sitting in a pile of ashes.


In the pic below, I think she was either pointing at a pattern made by the firing, or the sawdust embers still glowing.
(click to enlarge for a better view.)


I'm telling you- this was some exciting stuff! I wish I would have gotten pics of the entire process, but I was busy throwing in the sawdust & dodging smoke & flames! But, we'll likely do another firing tomorrow, so I'll try to get more pics of this fascinating process. I am totally hooked on clay and all the amazing directions you can go with it!
:)

Tuesday, May 17, 2011

Home "Pit Fire"~ More Experimentations

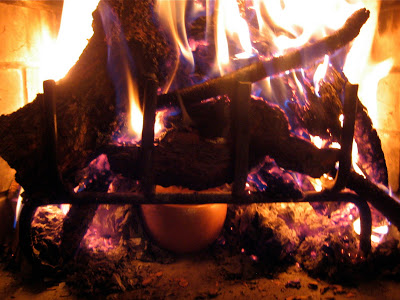
You may recall from a previous post the dilemma I'm having in my micaceous clay class. We were scheduled to have our big pit- fire this weekend, but due to our very dry weather, the fire hazard for an open outdoor firing is too high so it is postponed until??? While once the pieces are bisqued they are ready use, it is the pit fire that gives them the traditional smoke cloud. I talked to my instructor about doing a few pieces in my little fireplace at home, & he thought it could possibly work- so I gave it a shot. 
There's a bowl & a pot burning away in that pile of wood, & you can see the mug under the grate.


Interesting results, but I don't think I'd do it this way again. The mug didn't get hot enough to achieve a smoke cloud, but rather an all over smokey look.


My bean pot... hmmmm, it turned out ok, but the backside got a little too smoky in my opinion.


My last piece~ a large salad bowl, I thought turned out rather nice.


But alas, the salad bowl was not meant to be. I carried it to school today in a bag full of potluck goodies, which I knocked against my car while grabbing another armful of things... and, well, you guessed it, knocked a chunk of the top! :( Dang it!!   And yes, I do admit I did utter a few choice words just a little stronger than that! But to me, working with clay  is always a lesson in non- attachment. Things break, can blow in the kiln, or you can ruin an otherwise awesome piece by choosing the wrong glaze, (or trying to do a pit fire in your fireplace.)  But it's hard not to be attached to the micaceous pieces, because they are so labor intensive. While I am getting a litter faster, each pot can take me at least 5 hours from start to finish! Our last class is friday and I'm still not sure exactly what I'll do about the real pit fire, but I do have some ideas percolating. We did do a Raku firing of a few pieces last week, which I thought turned out pretty cool... I'll share the results soon!
:)

Saturday, May 14, 2011

Experiments, Persistence, Big News & Delightfully My Longest Post Ever!


"All life is an experiment... the more experiments you make, the better."
              ~Ralph Waldo Emerson

So here I go again with my Experiments in Clay! I'm sure you all thought that I had forgotten all about trying to go large after my big bear "busted loose" earlier in the semester. Nope! Ideas have just been percolating, that's all! And I came up with (what I thought was) a brilliant one!! It's a long story with lots of photos, but stick with me here, 'cause it has a  very exciting ending!(You may want to grab a cup of coffee & a snack... and feel free to take an intermission at your leisure!) O.k. so here was my big idea- build an armature out of chicken wire, cover it w/ slabs of Magic Clay, cut it apart,& put it back together.(Remembering the properties of this fiber clay- unlike standard clay bodies,you are supposed to be able to add wet to dry, take apart, put back together & so forth.) No Problema, right?  Right... in theory anyhow. Well, as I said, I thought this idea was simply brilliant, and I'm always up for a good experiment so off I went! First to the hardware store, where I bought a roll of chicken wire... and about 2 or so hours later, I had put together a roughly 2 ft long by foot high bear "undersculpture."


A few days later, I took it to school, covered it in plastic wrap & tape so that the clay would not stick to the chicken wire, and, at the suggestion of my instructor, added some foam to provide some "give" as the clay shrank during the drying process, so as to prevent cracking.


Here I have rolled out clay slabs & blended them together to form the top of the bear body. So far, all was going according to plan. Little did I know my plan was about to change.
:)


My original plan was to cover the under sculpture completely in clay, let it dry, cut it apart & put it back together. After I did the top, I realized it how difficult it would be to flip the bear on it's back w/ wet clay on top in order to do the bottom portion.


So on I went to plan B. I was really just making this up as I went along, which was rather funny, because I can't tell you how many people came up to me asking what the heck I was doing... as if I could give them a concrete answer! All I could say was "I have no idea, I'm just experimenting!" Anywho, so what I did next was (hold on to your seat!)let it dry to a little less than a "leather hard" state, so I could begin the cutting. 


I realized that if I had even finished the legs, I'd have a really difficult time getting them loose from the chicken wire, so I took off the top & the lateral portion of the legs, flipped it on it's back, and did the underside.


Problem was, the top portion was large, and was not dry enough to hold its shape off the under sculpture.


The pieces had to dry together, or as close together as I could get them, in order to maintain their shape so that I could get the pieces back together at some point. So, everything went back together on the under sculpture.


Keep in mind that the clay on the underside is in quite a wet state, so even keeping it together at this point was a feat! Until a came up with another brilliant idea. Tape!


Poor guy. It looks like he is being held hostage! I left him there over the weekend to dry completely with a note stuck to him that said "this is not trash- don't throw away! :)" 
When I came in the following week he was fully dry, so I untaped him, armed with a ceramic file, goggles and mask- with full intention of putting it all back together.(Dang! I wish I had a picture of that- I'm sure I looked pretty hilarious... or crazy... or both!) After about an hour outside, I could see it was just not going to work. The pieces just weren't going to fit properly and to try to reattach with the magic clay would be certain failure. At this point, I was still up for firing it- just to see what would happen. This is what happened- my many pieces broke into many more. Aaaah, my hopes deflated!


Now, this is the point where I was ready to call it quits. I roughly assembled the pieces, thinking I could possibly glue it back together, but took a look at it and thought "Nope, I'm done... I tried, I failed- no big deal." I'd have never known unless I experimented, & really, it was just something I needed to do, and it was fun! But then, my instructor came up with an awesome idea. He suggested we do a sawdust fire. Sounds great to me!


All my bear bits & pieces went into the can, along with wads of paper & sawdust, where they smoked away for many hours. When I came in the next day to pull out the pieces, this is what I found. Yes, that's right, my bear pieces broke into even more pieces!!! But I was not disheartened... what caught my eye was the beautiful patterns of smoke created by this process. Sifting through the ash, I felt like a kid an easter egg hunt... stopping to examine each piece like it was the greatest treasure ever! Thankfully the top portion stayed in one piece!


The day after that I got to work!! Well not that I hadn't been already, but you know what I mean.(My instructor had suggested that I put it together & enter it in the student art show... well, of course I was going to put it together, but I was not deluding myself at that point that I would enter. Plus the Jury to get in was only a day & 1/2 away!)Putting this together was what I would imagine it to be like if one were putting together archeological remnants. Sometimes it was slow going, like putting together puzzle pieces... and trying to find out just what pieces fit where.


And some pieces were quite small!


But it was so much fun... and challenging! By the way- the "5 minute epoxy" really starts setting in about 2 minutes or less, so you've really got to work fast once you mix it. And clearly, you can't put it all together at once, so it's mix, piece together, mix etc. The red tape is holding the pieces until they fully set, which is about an hour.


After about 7 hours, I was finally making progress!!


One of the hardest parts was trying to get the bottom part of the Jaw attached. The points of contact were just too small. It was getting late, so I got it as close as I could & propped it up with a needle tool, hoping it would hold. 


I came in the next morning for my Micaceous Class & found that it didn't. (Note to self: Tape! Not needle tool! Arrrgh!)
Well I was a little bummed, because at this point,I was thinking about that student show... hmmmm. So on my lunch break from Micaceous, there I was, sitting on the floor in the hallway with my piece, frantically mixing epoxy & trying to find the best position for the jaw... once I felt I did, I wrapped it very securely. 4 hours later, I took the tape off, and it held! YES!!
So here it was friday night- the Jury for the Student Show was at 9 a.m the next morning & I had to work. Should I enter? It's a pretty strange piece, to say the least! 

But with the last little of bit of encouragement from my Micaceous instructor, I decided what the heck. I left my entry form, along with my finished piece in the studio~


(Now I did have a little panic attack at work the next day thinking "why the heck did I even enter... I've got to get in there & get it out before anyone sees it!" But, thankfully it was too late for that!)
Because, after all of that... YOU WILL NEVER BELIEVE WHAT HAPPENED NEXT!!! It is like the fledgling artist fairy tale! Not only did I get into the Juried Student Art Show, but I won First Place for Ceramic Sculpture!!!
:)
I am honored, a little shocked, and certainly excited to say the least!

Here is my piece in it's new home in the Foyer of the Art Building @ Santa Fe Community College~ 


It is quite fun (and quite an honor)to walk through & see it on display amongst many other talented works! The show will be up for the next couple of months, so stop on by if you get the chance!
:)

"Once"


(ps- Thanks to all for stopping by & reading this post, as I realize it's a looooong one! As you may know, I am quite a documenter of process... and I just couldn't leave anything out on this one! Perhaps I should've done it as a 4 part mini-series! Special thanks also, to both of my ceramics instructors @ SFCC, who encouraged me to keep going with this project & enter this piece!)
:)

Saturday, May 7, 2011

It's All About the Slip!

Well, it's also about the building of the pot, the scraping, the sanding, the burnishing, the bisque & finally the pit fire! But the application of micaceous slip (mica rich clay + water)
is what gives the pot that earthy sparkling glow. (Yes, that's right- I'm slathering my mud pots with.... mud!) Looks delicious, doesn't it?
:)


I've had a very busy week of scraping & sanding pots, now that the winds have been cooperating a bit & I've had some extra time to get in the studio. No pics of sanding this time... so just picture Pig Pen with a cloud of dust swirling around his head & you'll get the idea! I had quite a backlog of work to get done, since I've done the various assignments for class, but have also managed to squeeze in a few extra pieces here & there. So here's what I've been up to!
The pic below shows the slip applied to the outer portion of the pot. Once it is stone burnished & dry, the inside will be done.


Yesterday, I slipped & burnished the 3 wolf pups, 2 small dishes, a large salad bowl, a mug & a bean pot! Whew! You can see the difference in color once the slip is applied. Those went into the kiln yesterday afternoon.


This morning I went in to unload the bisqued pots~ it was pretty fun to see the change in color to deep orange. They will change again once they are pit-fired... the bright orange will tone down, and smoke clouds will be fired in (see pots in sidebar.) The pit fire was scheduled for 2 weeks from now, but has been cancelled. Due to our lack of precipitation this winter, and fire hazards due to said lack of precip + winds, it has been postponed until we don't know when. (I am thinking of other options... perhaps transporting them with me to San Diego this summer & having a big pot-firing beach bonfire?)
:)


You may have guessed the one in the center is mine if you saw the pot on the sidebar. While they are a bit of a pain to slip & burnish, I do like the fluted rim.
:)


One of my favorites was this little "mini bean pot."  It's about the size of a softball & I think it is quite cute.


And of course, the 3 little wolf pups. I love them & have titled them "Good Things Come in Threes."  There is a chance that we may be able to smoke fire a few pieces of our work in the Raku kiln (it's apparently out for repairs or something) and if we do, it will turn the pieces a very cool shimmery black. I hope to do the wolf pups this way.


Here are all my pieces that came out of the kiln today. Overall I was quite happy with them, though I have to admit, I am my own worst critic & upon close inspection, I could find a few flaws... but no matter, I am learning!
:)


 I also finished a couple bowls today, as well as the Bear Pot~


Maintaining a good fit on the lid from wet to dry to sanding is tough! It's not perfect, but I think I quite like it anyhow! It'll go in the kiln next week.
:) 


I've included this pic as it really shows the transformation that occurs during the process. To the right- unfinished "rough" pots, in the back- the sanded, slipped & burnished bear pot, and of course the bisqued pots on the left. Unfortunately, I won't be able to show you the actual finished pieces until I don't know when, but rest assured I will post them at some point! :) Until then, I've gotten some work out of the kiln from my other class that I have not gotten around to photographing & posting yet... so coming soon~
"The Good, The Bad & The Ugly..."
stay tuned!
:)