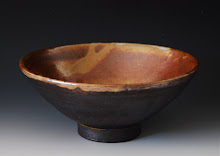
I had mentioned in a previous post that I was working on 2 pots concurrently... the Pot from Felipe's Clay and this one that I finished last week & am just getting around to posting! I'm really pleased with the way it turned out! It's about same size as my first Micaceous Pot~ pretty big! This represents roughly 10 to 12 hours of work~
Of course I've got to show a little process... it's what I do!
:)
The first step in building a large pot is rolling out the clay (just like rolling out dough) and placing it in a puki (a shallow ceramic form which helps hold the the shape & prevents your pot from collapsing.)
After smoothing it consistently in the puki, you add your first coil....
...and another, and another, and so on. It looks pretty rough at this stage, but if you smooth, paddle & shape it for long enough, it will begin to look like this~
At this point, I am truly amazed it starts to look like an actual Pot! Being new to the coiling method, it still boggles my mind sometimes... the transition from slab & coil to Pot... and the fact that it all stay together!
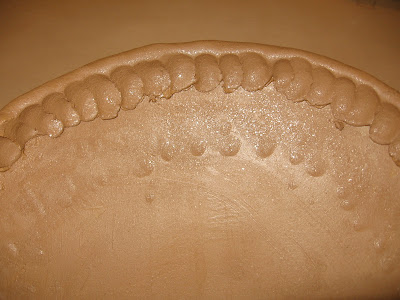
The addition of the fluted rim...
And Handles!
And...Whala!
(After all the scraping, sanding & slip applying and burnishing)
The finished Pot!
Good news is, all the pots have made it through the bisque kiln, and we'll do the final pit fire on Wednesday... pretty exciting stuff! I've got a few other things I'm working on, and still some glazing to do on things I started over a month ago... so I may post those somewhere along the way... but these pots have been my main focus these past 7 weeks. And though I may complain from time to time (o.k, maybe a lot) about working too much & not having enough time to create, I am truly grateful for the time that I have had to learn this process!
:)


14 comments:
Becky,
I was wondering when we might see the recently fired products. Looks very professional. Hope your week went well. Weather was so perfect in Sante Fe. Its overcast and drizzly in SD and looks like it will stay that way for a while
Dad
Very interesting post Becky - I had no idea how you went from a 'blob' of clay to a finished pot. Your post provided a great pictorial and explanation - I'm amazed though. Your pot looks ready for some serious cookin' !
Fingers crossed for the pit fire - good luck !
I envy your talent. This is always something I wanted to try.
Beautiful pot!
Adding the coils would seem hard enough, but the shaping of the fluted rim...extremely difficult I imagine! You're talented, Becky!
It IS like baking, isn't it?
That is why I wondered about the feel of the different clay you used last week. Like using a different flour for bread.
This pot looks big, especially in the first picture, with the perspective. Alibaba here you come :-)
Fingers crossed for the ashing session.
Well done. I have to confess, I kept thinking of pumpkin pie while looking at the photos...it must be time for lunch. *grin*
The fluted edge on the pot looks great. Nice work.
Another wonderful piece Becky! Last weeks is still my favorite but this one is running a close second. Will you be part of the holiday sale in December at SF Clay?
Becky, Amazing! You would never know that these pots are your first coiled pieces, it looks like you have been doing this for a long time! Beautiful! xoxo
You sure stay busy...neat stuff!
Becky, you have the "gift'.... this is stunning!!!! Just gorgeous! I love seeing all the various stages..... it is really "living" art....
Hugs,
♥ Robin ♥
beautiful work! i just went back through a bunch of posts- i need to make sure you're on my blog roll, don't know why it's not updating? anyway- the pottery is beautiful and i love learning about the process- thanks for sharing.
Hi Becky, I have a feeling the comment I made for this post didn't go through - I was having some problems with Blogger. I LOVE your scalloped pot - it's fun to read about your process. So glad the pots made it through the fire. You've done some beautiful work.
Hey - I recognize the background of your first shot! Ha ha!
It's hard to believe that you use coils to make this pot! That's a lot of smoothing going on!
It turned out wonderful!
Post a Comment