Let the Beauty of what you Love be what you Do...
~Rumi
Showing posts with label sweet glaze. Show all posts

Saturday, January 25, 2014

The Bears, Kiln Magic & The Best News Ever!!!


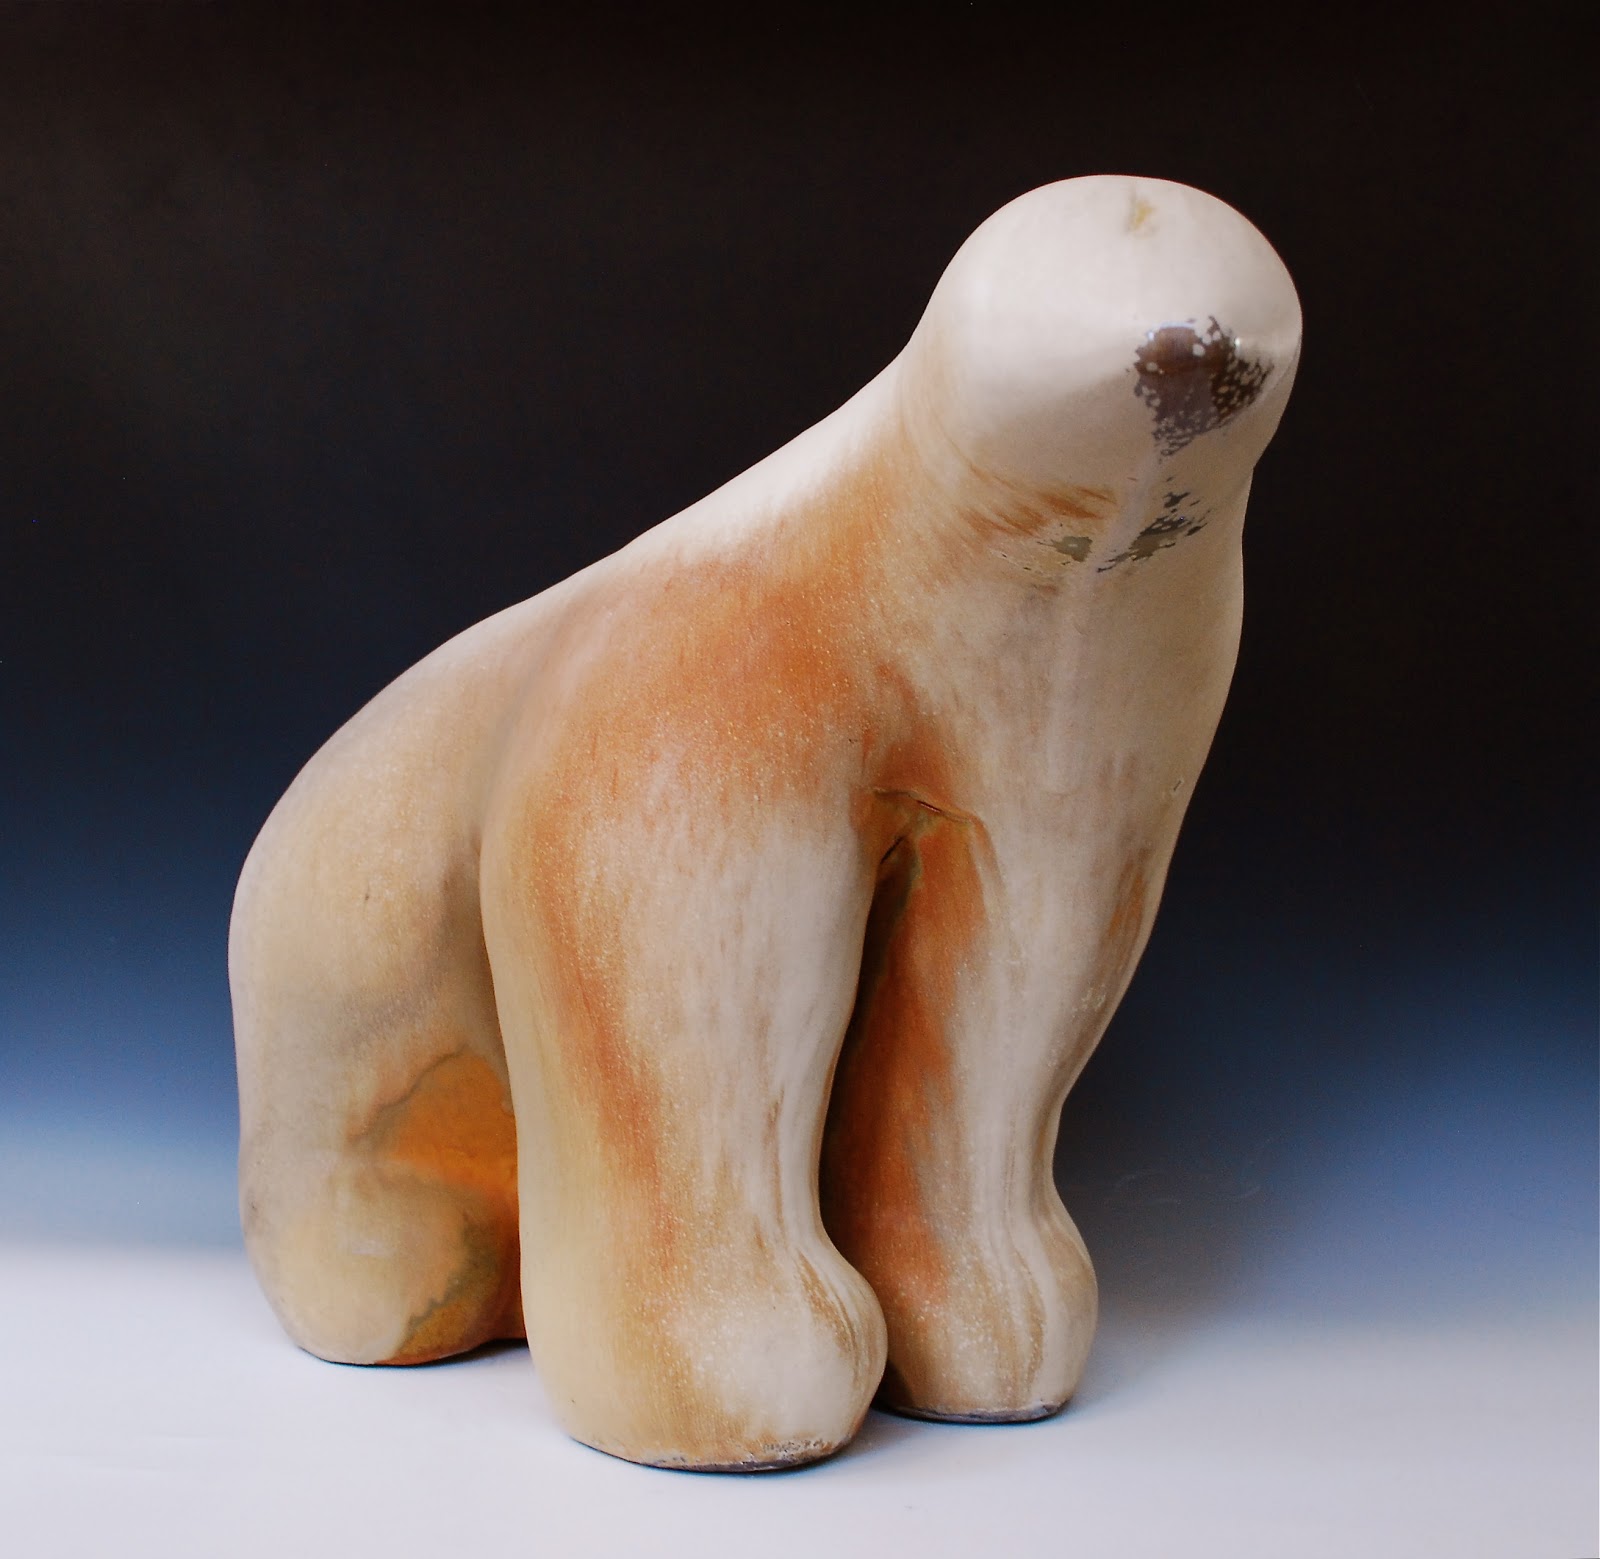
Though I meant to get these posted in December- time seriously got away from me! It was crazy busy at the end of the semester... getting things fired, photographing work, critiques, moving out of the studio & then driving home to spend time w/ family for the holidays & then right back to work & starting up new classes... whew! A whirlwind of activity, but finally here they are- the 8 salt fired bears from last semester's continuing Polar Series.
(posted from lighter to darker rather than in numerical order of how I built them)

#1 below is one of my faves.

 Polar Bear # 1
H: 14"  W: 11"  D: 21.5"
Ann's Soda Cone 10 Clay Body- Salt Fired to Cone 11

Alternate View

 Polar Bear # 2
H: 15"  W: 17.5" D: 16"
Ann's Soda Cone 10 Clay Body- Salt Fired to Cone 11

Alternate View- my fave angle :)

Polar Bear # 3
H: 15"  W: 13"  D 18 "
Ann's Soda Cone 10 Clay Body- Salt Fired to Cone 11

Alternate View 1

Alternate View 2

Polar Bear # 5
H: 16.5"  W:16" D 15"
Laguna Sculpture Cone 10 Clay Body- Salt Fired to Cone 9 Oxidation


Alternate View 1

Alternate View 2
Alternate View 3

# 6 below quickly outranked #1 as my all time fave when it came out of the kiln. This glaze + this clay body + salt firing, in my humble opinion, produces the most amazing results! Click twice on any image to enlarge to see the effects of this Kiln Magic in greater detail.
:)
Polar Bear # 6
H: 14.5"  W: 16"  D: 21.5"
Death Valley Red Cone 10 Clay Body- Salt Fired to Cone 11

Detail~head/neck

Detail~foot

Polar Bear # 4
H: 16.5"  W: 16"  D: 19"
Laguna Dark Brown Cone 10 Clay Body- Salt Fired to Cone 11

Alternate View

Polar Bear # 7
H: 15"  W: 13.5"  D: 23.5"
Laguna Dark Brown Cone 10 Clay Body- Salt Fired Cone 10

Alternate View
Polar Bear # 8
H: 15.5"  W:13" D: 26"
Death Valley Red Cone 10 Clay Body- Salt fired to Cone 11

glaze detail 1

glaze detail 2
The glaze detail on # 6 above only goes to show you... if you love a glaze enough, it truly will love you back!! 
:)
Below is my studio at the end of the semester... all cleaned up & turned into an impromptu photo studio using natural light, as my apartment is far too dark to photograph in.


And below, the bears out of the studio & in the classroom during critiques.

"The Last Great Migration" (Prototype)

My reflections on this past semester are mostly positive. While I am not crazy about every single piece, I am crazy about at least half of them, which is good!
 (I used the same glaze & firing methods on each piece above, changing only the clay bodies to move in gradation from variations of white/gray to black to symbolize the Polar Bear as a messenger for the environmental challenges we face.)
 I love this glaze, I love hand building these forms & I love salt/soda firing!!! Though I did get a little clay obsessed between the bears & the micaceous pottery... quite frankly, I would have done much, much more if I didn't have to do things like sleep & work! I think the obsession comes in part from not having my own studio... I feel like when I am taking classes, I need to squeeze in as much studio time as I possibly can, in order to maximize my learning & growth in the wild world of ceramics!
:)
On that note, I am super excited about sharing
THE Best News Ever!!!
One of my pieces has been accepted into
The 6th Annual Juried Exhibition
"Beyond the Brickyard"
at the Archie Bray Foundation for the Ceramic Arts in Helena, Montana!
I am totally honored to have my work included in such an amazing exhibit, at such an amazing place, with such an amazing group of ceramic artists.
The show opens next weekend, so if you're in the area... go!
If you cannot make it, the exhibit will also be online Feb 3rd, so be sure to check it out!
:)


Saturday, June 15, 2013

Alternative Firing Workshop, Reglazing, Student Art Show & lots of Great News!!

Pardon my lack of blogging lately... life has been busy as usual & I've placed the blog on the back burner, but I just wanted to get in a "catch up" post before taking a little break for the summer. Below are a few images from the Saggar Fire Workshop I took at the Community College in May. Our clay club brought in Lee Akins, a wonderfully talented local ceramicist to do a full day workshop on Alternative Firing techniques. (click on his name above to see his amazing work!) We all brought in a few bisqued pieces to work with & fire. With this technique, you take bisqueware brush on Iron Chloride, along with various combustibles such as coffee grounds, wood chips, banana peels, dried tea bags, copper wire salt & so forth.
I had never done anything like this, so I tried a combo of the above ingredients on 1 medium & 2 smaller bears.


All the ingredients are held close to the pieces by wrapping them in aluminum foil, which are then placed in the Raku Kiln for firing.


The pieces are then brought up to a temp of roughly 1360 degrees & left overnight to cool.

Excited classmates pulling pieces from Raku Kiln

Below are the 2 small bears after firing, which I quite liked.


The results on the medium bear I was not so crazy about... I just didn't feel the technique fit the form... it felt too harsh to me.


So, always up for a little experimentation, I reglazed the piece using the Satin Mint Modified glaze & it was Salt Fired to Cone 11 in the Soda Kiln.


I thought the results were much more pleasing the 2nd time around. It retained some of the effects from the Saggar Fire, but added a less harsh tonal variations, as well as gaining the crystallization effects around the face of the piece.
But the BIG NEWS of the Semester is this!! I had entered the piece below (you may remember this piece from this post, or this post) in the Annual Student Art Show. It's a juried show, so I was pleased of course, just to get in. 

"The Guardian"

 The Best News, however, was that not only did I get in, but I won Best in Show for Ceramics (which means I also got a gift certificate to New Mexico Clay- Yay!) AND I was this years recipient of the Dean's Purchase Award!!! 


This means that the College not only bought my piece, but it will become part of the permanent art collection at Santa Fe Community College! I could not have asked for a better end to wonderful semester! This semester was full of "firsts" for me... my first ceramic sale at the Red Dot Gallery, (I still don't know who purchased that piece, but if they should stumble upon my blog I am sending out a huge thank you for your interest in my work!!) my first group show, and, needless to say, my first Dean's Purchase Award! 
(This also gave me the encouragement & positive feedback I needed to keep going with the clay. I have to say, it hard sometimes to be a middle aged art student! I have often wondered what the heck I am doing... while other's my age are working for retirement, during the semester I am essentially working just enough to pay the rent & support my clay endeavors!) 
Anyhow, here are a few more shots from the Visual Arts Gallery at SFCC~ the show will be up through summer, so if you get a chance, stop on by.
:)


I'm also pleased to announce that the piece below (my first of the Semester) has also been selected to be in the Summer show at the Red Dot Gallery on Canyon Road. The show will open at the beginning of July & run through August... 

"Waiting on the World to Change"

so if you're in town & find yourself wandering up Canyon Road, stop on by as well!
:)

*On a side note, it is likely that I won't be blogging much this summer as I try to work as much as possible to save up for the Fall Semester, as well as spend time with family... so I wish you all a VERY HAPPY SUMMER SEASON!!
:)


Tuesday, May 14, 2013

Semester Season Finale!! Last Bears of the Semester: 9 & 10 of the Polar Series


Thanks to all that stopped by our Ceramics Show! I think it was a successful event & so nice to see everyone's work displayed in such a professional manner. 
(Sorry I didn't take pics of the event- just the set up- but some other people did, so hopefully those will make their way around.)
Now I'm just tying up loose ends & wrapping up the end of the Semester~ here are number 9 & 10 of the Polar Series. 
(#11 didn't make it into the kiln due to spatial limitations at the end of the Semester... so it'll have to wait patiently til next time!)

#9 In the Polar Series
Ann's Soda Cone 10 Clay Body- Salt fired to Cone 11
Satin Mint Modified Glaze
Dimensions: H: 13.5"  W:13.5"  L:22"

This was one of the 3 that I built w/ the Ann's Soda Clay Body while I was waiting for results on the others.


I have to say, I do love the glaze effects on the Ann's Soda, & while the Soda Kiln can be very unpredictable, the 3 done w/ this clay body came out very similar.


The only problem, as you recall, is the tendency of this clay body to crack in the Soda Kiln. This one, #9, actually cracked during the drying phase, despite my longer than normal drying time. I had used the "Magic Mender" for bisqueware, which actually worked quite well & sealed the crack during the bisque. At least temporarily... until it went into the Soda. While it didn't crack wide completely open during the final firing, you can see where it looks like it may have opened during the fire,(diagonal line below & to the left of the neck) but settled back down. I had sprayed extra glaze on on that part hoping that would help... note the glaze drip coming down from the neck as well.


Signature Soda Kiss on the face...


and arctic feeling polar haunches.


I photo'd these straight out of the kiln in my improvised photo booth in my little studio space at school. The photos aren't the best, but it worked in a pinch to get them documented. 
Below is my Piece de la Resistance of the Semester!
When it first came out of the kiln, I was like "Whoa, that's intense," not sure if I was liking it or not... it was so different than the others! It only took me about 30 minutes to completely fall in love with it, and it is now my favorite piece! And YES, it is the same glaze as the one above! Amazing what a difference the clay bodies make!
I had tested several little bears with the dark brown clay body with this glaze last semester... the results came out very dark brown... almost black, so I was interested as to how it would work on a larger piece. Below are several views. It can appear grayish to black with brown highlights, depending on the lighting. I love how the darker areas shimmer when hit by sunlight.

#10 in the Polar Series
Laguna Dark Brown Cone 10 Clay Body, Salt Fired to Cone 11
Satin Mint Modified Glaze
Dimensions: H: 15"  W: 10"  L: 22"


So that wraps it up for now! Now I've got to get to studio cleaning & get ready for my more permanent move this week. I've got one more clay related post on a workshop I took last month... will try to get it posted next week.
See you soon!
:)


Friday, December 7, 2012

Cracks Happen... # 3 in the Polar Series


#3 of the larger Polar Bear Series- Coiled Piece
Ann's Soda Clay Body~ Soda Fired to Cone 11
Dimensions~ H:16"  W: 10.5"   L: 22.5"

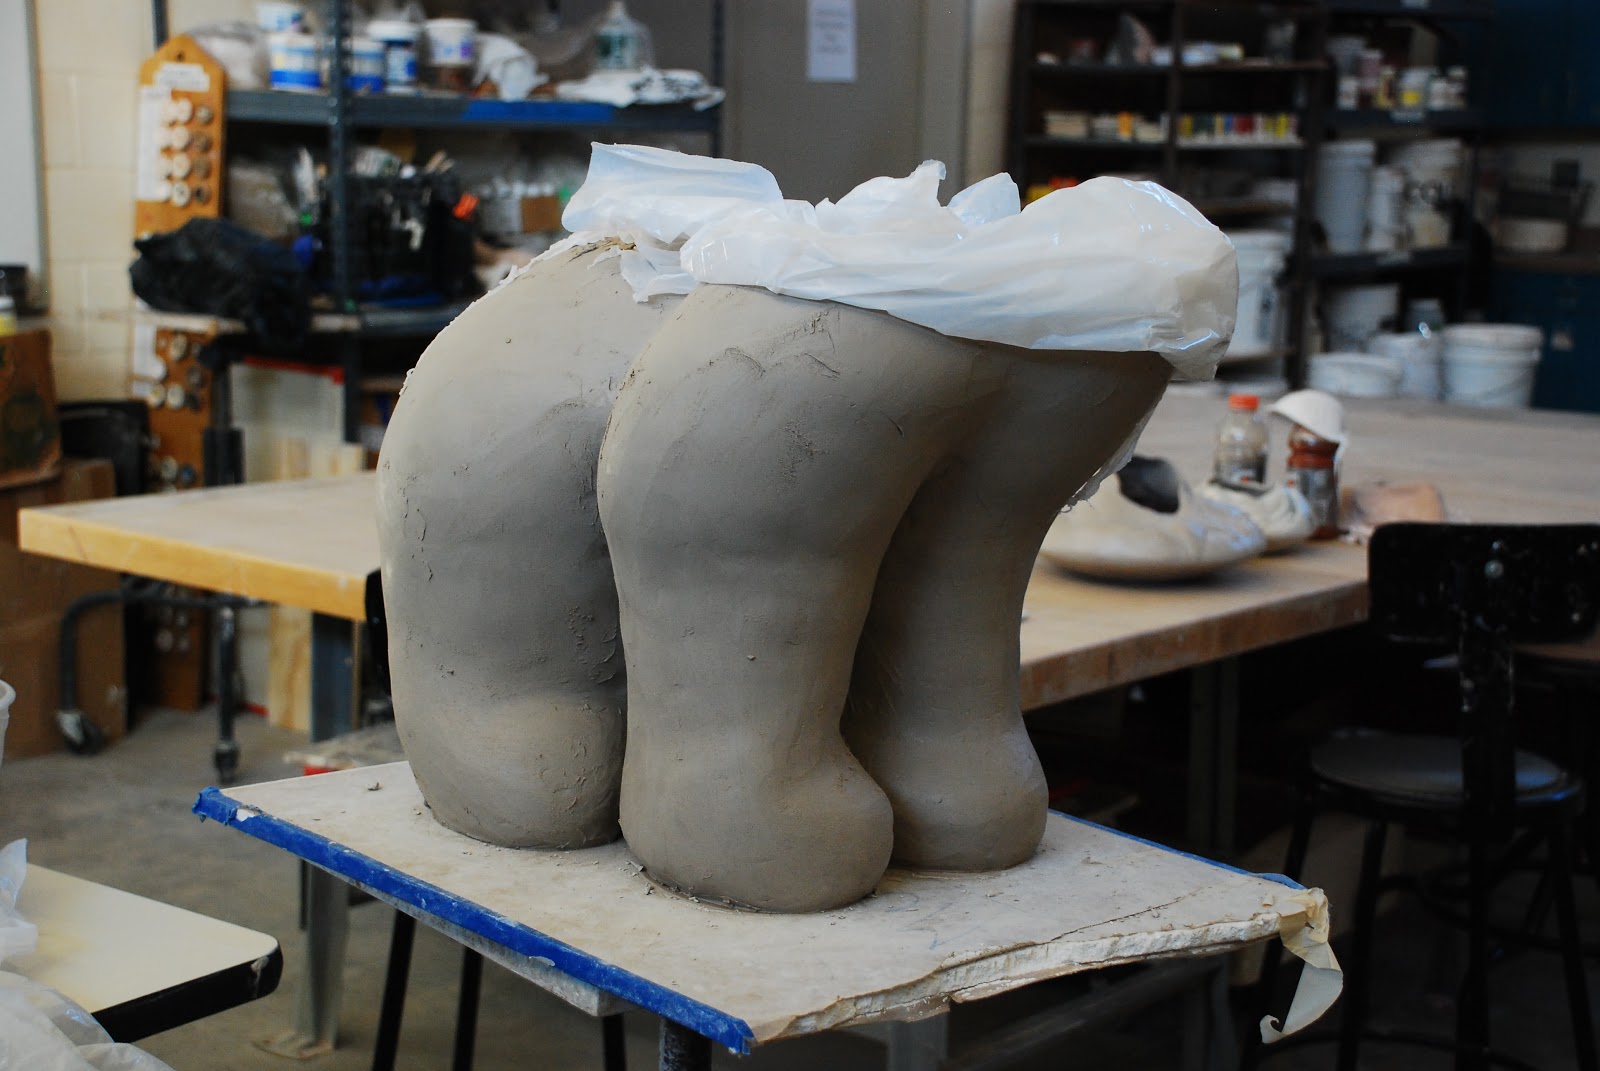
If you had read my last post, you know this was exactly what I was worried about. It seems the larger I go w/ the bears, the more apt they are to crack during the final firing in the Soda Kiln. I  thought about it a lot & spoke w/ my instructors about why this is happening. (oh, also note the back foot... one of my friends cups was stuck to it when it came out of the kiln.)


I believe several things are happening. 
One, the clay I am using is more of a throwing clay vs a sculptural clay. When I build small to medium, the clay body can handle it, but when I go bigger & add all the twists & turns that I do, I am not sure this clay body can take it. (Though I know people do large scale porcelain work- so that kind throws that theory out, but I plan on testing several grittier sculptural clays next semester.) Related to this also, I believe, is the fact that the Soda Kiln can heat unevenly- the bottom can be around cone 9, while the top (such as in our last firing) was around cone 13... perhaps the Ann's Soda Cone 10 clay body does not like that much heat!
Two, perhaps I am drying the clay too fast. Once a sculpture is finished, I have not been covering it & letting it dry slowly... I simply uncover it & let it dry. Though, on the smaller pieces, that was not an issue... I'd often let them sit outside in the dry NM fall weather where the humidity was quite low- which literally sucked the moisture out.
Three, (and I think this could be one of the main issues) because I only make 4 pencil sized holes on the bottom for venting, the outside of the sculpture is drying MUCH faster than the inside. 
My Resolutions & what I will be working on next semester~

1)Testing various sculptural Clay Bodies in this large format.
2.) Drying pieces very slowly!
3.) Placing larger & more vent holes on the bottom of the piece.
4.) Building slower than I already do... covering the outside of the piece & allowing more air to get to the inside before closing.
( I invite commentary or suggestion on these issues!)
Here are a few more views. This was the first bear done w/ a batch of freshly mixed glaze... so I was glad to know that I had the right recipe from glaze calc last semester & mixed it properly. Despite all the cracking on this piece, I am still totally in love w/ this glaze!

Close up of the glaze where it crystalized over the neck & nose of the piece.


Below is # 4 in the Polar Bear Series. (No, I don't count "The Beast," which was a bear -no pun intended- of a project... to me, it does not fit w/ this series, nor do the smaller versions.)


I finished him up about a month ago & he has been through the bisque kiln w/ only minimal cracking. He is larger than all the others- wet measurements were 23 inches tall, 20 inches long & 14 inches wide. I was afraid that if I glazed him up & put him in the Soda Kiln, he'd just crack up like # 3. Actually I am very certain of this. He'll be in storage over winter break until I decide whether to go for it & begin to learn about post- production crack repair, or maybe leave him in the bisqued state & do some sort of "cold surface" treatment like painting and/or staining.
In other clay news, our Community College Clay Club Sale was a success! We had some 39 clay students that participated & brought in just over $14,000 in combined sales! 40% goes to the clay club (for things like advertising, bringing in outside artists for demos, rebuilding of the beloved soda kiln & so forth,) 60% to individual artists. Below is my table of... you guessed it...  pots & bears.
:)


 While I myself did not get rich, (ha ha) I did bring in about $680 which would translate to about $400 after 40% to the clay club... which, considering it was my first sale~  was not at all bad. Although the hours were long (about 11 hours each day for 2 days,) & I was quite exhausted by the end... I think overall it was a good experience- it provided some exposure for my art, and it was fun to be a part of this larger clay community event. (It also generated some post sale sales from co- workers, which is awesome!) Special thanks to my instructors & the Clay Clubbers for putting on this event... there's a lot that goes on behind the scenes to make it all happen, and thanks to all who stopped by to say hello & purchase a pot & a bear or two!
I've just finished for the semester & am back to working full time through the holidays AND I'll be moving yet again... so I don't know if I'll be blogging much for a while... though I'll try to get out w/ my camera for an evening walk or two... I love all the lights & farolitos up around town this time of year. I promise to share if I do. 
:)
Happy December! May it be a peaceful one.
:)