Let the Beauty of what you Love be what you Do...
~Rumi
Showing posts with label soda firing. Show all posts

Wednesday, April 24, 2013

Fresh out of the Kiln~ 5 & 6 of the Polar Series


Things are moving along nicely & pieces have been getting fired on a regular basis this past month. This is super exciting for me to be able to see the results of work done over the course of a semester especially given all the different clay bodies I'm testing~ it gives me so much information as to what works & what doesn't! These two were actually built in February and given about 3 weeks to dry, then bisqued, glazed & fired in the soda kiln- I just got them out of the kiln last week. The entire process takes roughly 6-7 weeks start to finish. I was very happy with the way the glaze worked on this clay body! 

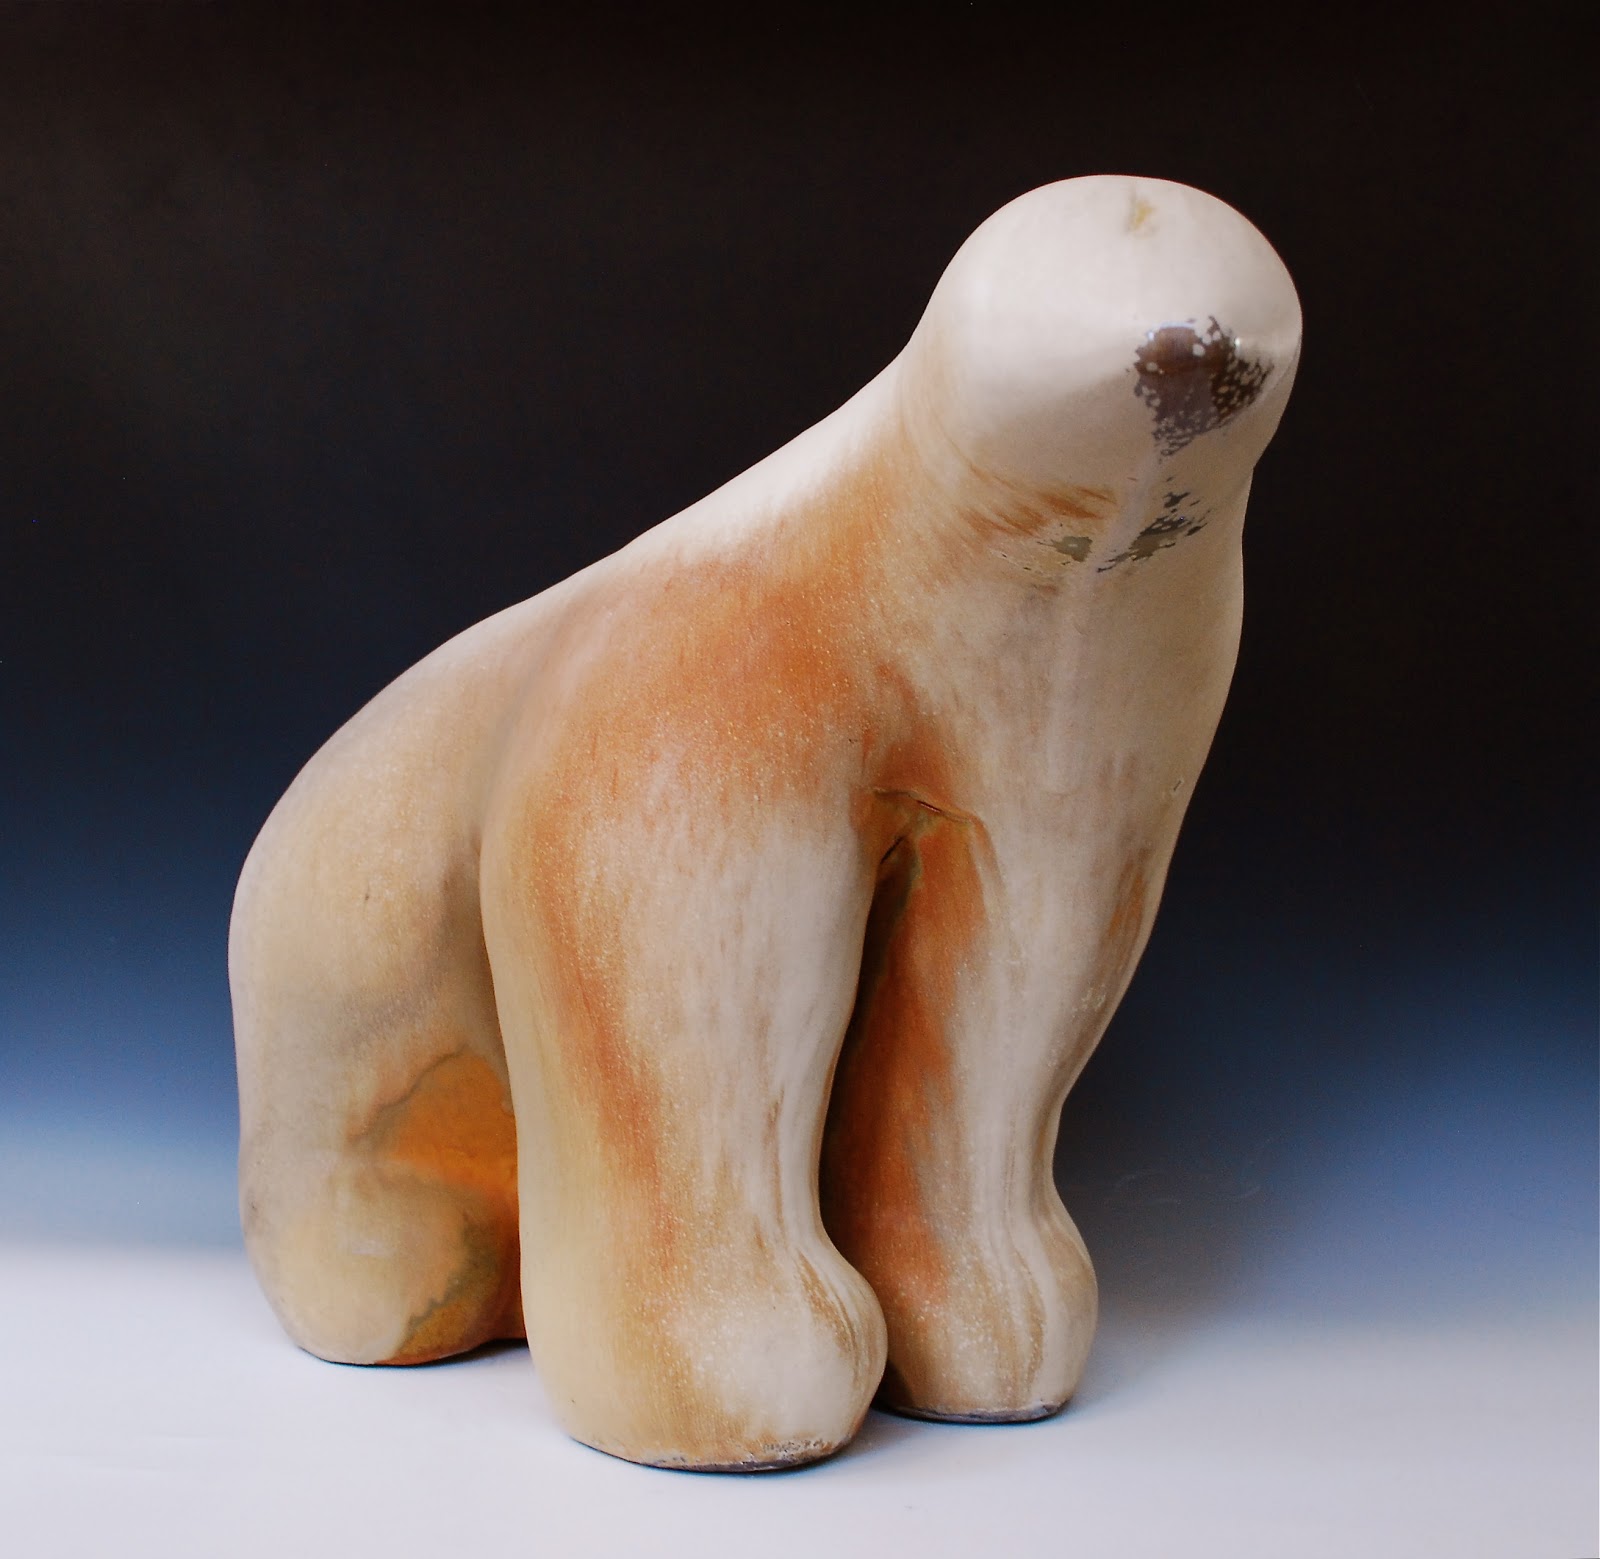
#6 Death Valley Red Cone 10 Clay Body; Salt Fired to Cone 11
Satin Mint Modified Glaze
Dimensions: H: 12.5"  W: 10"  L 18.5"


Aerial View :)

I love how this piece received just a kiss of crystallization on the nose & cheek.
:)


Closer detail of glaze on piece~ 
(click on any photo to enlarge to see greater detail.)


Below is number 5 in the series. And yes, it's the same glaze! While I am not as crazy about the colors in this finished piece, I do like all the tonal variation achieved, and I find it so interesting how using different clay bodies can dramatically change the effect of the same glaze.

#5 WH8 Rough Cone 6-10 Clay Body; Salt Fired to Cone 11
Satin Mint Modified Glaze
Dimensions: H: 15"  W: 15"  L 14.5"
Another angle & detail~


Now, let me tell you, I did have some lofty goals for this semester in terms of how many bears I wanted to create, but with the upcoming move I originally decided to stop at 10. That would give me time to pack up, look for a new place & such. But noooooo, being the clay obsessed student that I am, I decided to go for one more. For number eleven, I went back to the NM Clay Super Sculpt (the first clay body of this semester) as I really enjoyed the glaze effects on that one, and I also enjoyed building with that clay body. All went really well, and I was building at a pretty good pace... until I got to the neck & head.


I had gotten to the point where I was thinking all I needed to do was spend maybe four hours to put the neck & head on... though I wanted to try something a little different... maybe a little abstract-y.


*Note to self: when time is limited... do not try a new direction in clay!!


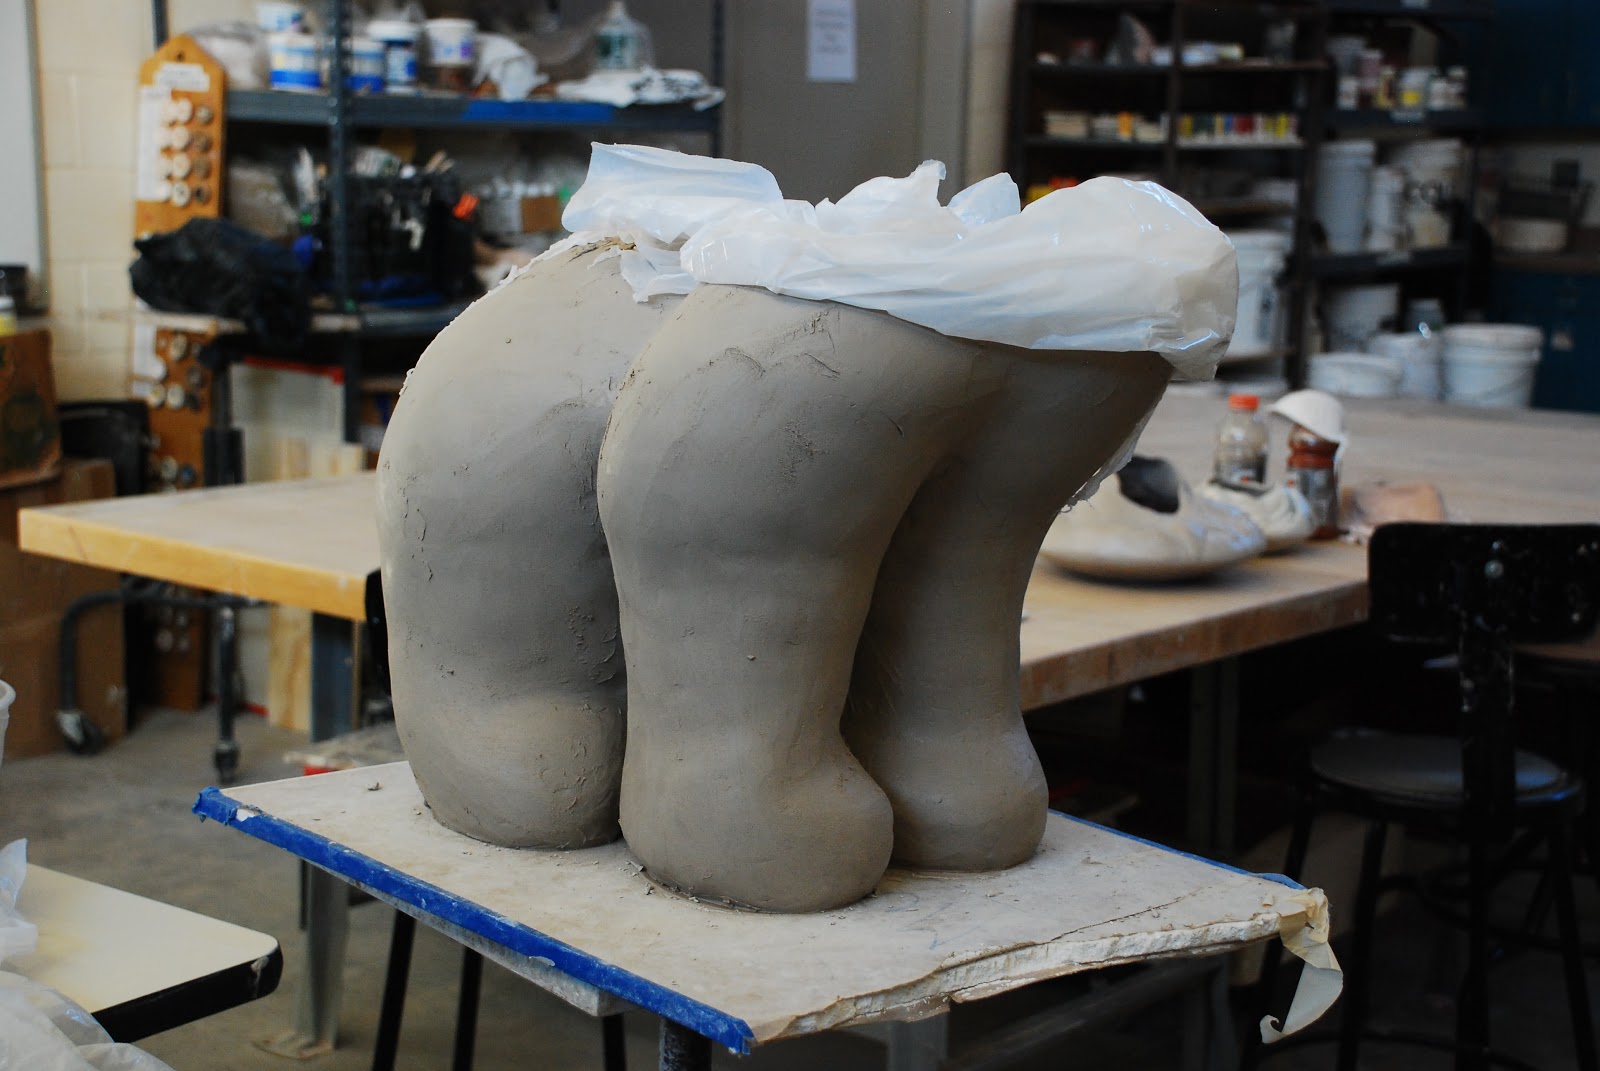
Over the course of 2 days... I probably built up & cut down the head & neck 6-7 times. Except for here (below) when I was getting frustrated... I just ripped it off!


And built it up again...


only to cut it down again...


and again!


After countless hours, I finally settled on this~


Though the back right shoulder is a little large (by the time I got the head right, I had let the lower portion of clay dry a bit too much to paddle in) I like the form alright.


This piece is drying away in the studio & will bisque soon. I also got 2 more finished pieces out of the soda kiln on monday, but I'm still working on editing the photos I took yesterday... will post soon! I'm currently in the midst of packing up in order to be out of my place by the 1st... but hope to catch up with you all soon!
:)






Saturday, April 13, 2013

Obsessed with Clay, my Crazy-busy Life & other Updates... :)

Oh where to start? Well, with clay of course! I've been spending 30-40 hours a week in the studio trying to get things accomplished as the end of the semester is quickly approaching. In addition, I'm working just enough to almost make ends meet, which takes up any "spare time" I might have... and does not leave any financial room for things like computer hard drives crashing (yes it did!) and various other unexpected expenses... but I digress! I just got a couple of new pieces out of the kiln last week, & you know I'm pretty excited about that!!!
 :)
 If you recall, I'm testing several clay bodies this semester to see how they hold up in the soda kiln with the larger bear sculptures.

#4 Soldate 60 Cone 10 Clay Body- Salt Fired to Cone 11
Satin Mint Modified Glaze
H: 15"   W: 10"   L :19"

The good news is no cracking so far~ yahoo!!! Above is number 4 in this semester's series. I was happy to see the break in glaze across the nose that I had missed in the first 2 pieces fired. Below are few other angles.


I am pleased not only with the fact that (knock on wood!)  none of the new clay bodies I've tried thus far have cracked with the larger sculptures, but given the unpredictability of firing in the soda kiln & the effects of this glaze on various clay bodies, I am actually also quite pleased with effects of each one. In hindsight I realize what a rather gutsy move it was to apply glaze to larger forms without first making an actual small test tile for each clay body. My theory really, was that there are so many different colors & textures in this one particular glaze, that had I done test tiles, and maybe only seen one funky brown color, I may have disregarded that clay body totally, without having been able to see the glaze effects & the fluidity on a larger piece.
So, you see, there is a method to my madness!

 #3 Big White Cone 5-10 Clay Body~ Salt Fired to Cone 11
Satin Mint Modified Glaze
H: 16"  W:17"  L 14.5"

Above is number 3 in this semester's series. It's funny... now that I've been making these forms for awhile, you'd think I'd have it down pat... but no! I still struggle with which way I want the head to go, and how to make it work as I move along. Sometimes it looks good to me from one angle, but not as much from another. The neck may seem to thin, or  maybe pointed at an odd angle, but I don't often see this as I am moving along... so it's a continual conversation between what's going on in my head, how that translates to my hands, and quite frankly at times I think the clay has a mind of it's own! I like this piece alright, but it is not my favorite. Below are few different angles.


It got just a touch of crystallization on the nose & on shoulder... I love that effect!


Which brings us to where I am now. Below is number 9 in the drying state. After I had built several bears with different clay bodies, I went back to the Ann's Soda... the clay body that I had originally started with & had problems with cracking. This one looked fine until a few days into the drying process...


then this happened!


A closer view~ YIKES!!!


I am trying to fix this with a product called "magic mender" for greenware... I just loaded him into the bisque today & will find out monday how it works. I'm keeping my fingers crossed, because typically if it has a crack before it is even fired... that spells trouble when it goes into the abusive soda kiln environment which generally fires to cone 11!
Number 7 & 8 (both of which were also Ann's Soda) have been bisqued, & unfortunately one of them developed a small crack as well. Bummer! I just have not had luck with that clay body on larger works, despite my increase in drying time this semester, as well as larger vent holes & slow bisque fire. I am kind of kicking myself in the butt for going back to this clay, but I needed to keep building to keep on schedule, and not knowing how the others would turn out, it was my fall back of sorts. I'm trying another Magic Mender product for high fire... I just glazed both 7 & 8 today & hopefully they'll be fired in the next couple of weeks. 


I had used 6 different clays for 6 different bears, 3 with Ann's & then decided to add one more clay body test! Above is number 10 just after I finished him. 


I used Laguna Dark Brown cone 10 for this one... the clay was an absolute joy to work with, and breaking the potter's rule, I have once again fallen in love with greenware- I love this guy! So far he's drying just fine.
In the meantime, I've been mixing glaze... loading & unloading kilns... sanding glaze drips off the bottom of finished pieces, you know, the usual. In addition, I am looking for a new place yet again. I had planned on moving at the end of December, as the place I was in sold... but they let me stay on month to month until now. I knew they were planning on remodeling sometime this spring... but was hoping it'd be after the semester ended! I have 2 more weeks left until I have to move & have not yet found an affordable place that fits my needs. So, needless to say, with clay, work, & moving, it will be a busy couple of weeks to say the least! 
Wish Me Luck!
:)


Friday, December 7, 2012

Cracks Happen... # 3 in the Polar Series


#3 of the larger Polar Bear Series- Coiled Piece
Ann's Soda Clay Body~ Soda Fired to Cone 11
Dimensions~ H:16"  W: 10.5"   L: 22.5"

If you had read my last post, you know this was exactly what I was worried about. It seems the larger I go w/ the bears, the more apt they are to crack during the final firing in the Soda Kiln. I  thought about it a lot & spoke w/ my instructors about why this is happening. (oh, also note the back foot... one of my friends cups was stuck to it when it came out of the kiln.)


I believe several things are happening. 
One, the clay I am using is more of a throwing clay vs a sculptural clay. When I build small to medium, the clay body can handle it, but when I go bigger & add all the twists & turns that I do, I am not sure this clay body can take it. (Though I know people do large scale porcelain work- so that kind throws that theory out, but I plan on testing several grittier sculptural clays next semester.) Related to this also, I believe, is the fact that the Soda Kiln can heat unevenly- the bottom can be around cone 9, while the top (such as in our last firing) was around cone 13... perhaps the Ann's Soda Cone 10 clay body does not like that much heat!
Two, perhaps I am drying the clay too fast. Once a sculpture is finished, I have not been covering it & letting it dry slowly... I simply uncover it & let it dry. Though, on the smaller pieces, that was not an issue... I'd often let them sit outside in the dry NM fall weather where the humidity was quite low- which literally sucked the moisture out.
Three, (and I think this could be one of the main issues) because I only make 4 pencil sized holes on the bottom for venting, the outside of the sculpture is drying MUCH faster than the inside. 
My Resolutions & what I will be working on next semester~

1)Testing various sculptural Clay Bodies in this large format.
2.) Drying pieces very slowly!
3.) Placing larger & more vent holes on the bottom of the piece.
4.) Building slower than I already do... covering the outside of the piece & allowing more air to get to the inside before closing.
( I invite commentary or suggestion on these issues!)
Here are a few more views. This was the first bear done w/ a batch of freshly mixed glaze... so I was glad to know that I had the right recipe from glaze calc last semester & mixed it properly. Despite all the cracking on this piece, I am still totally in love w/ this glaze!

Close up of the glaze where it crystalized over the neck & nose of the piece.


Below is # 4 in the Polar Bear Series. (No, I don't count "The Beast," which was a bear -no pun intended- of a project... to me, it does not fit w/ this series, nor do the smaller versions.)


I finished him up about a month ago & he has been through the bisque kiln w/ only minimal cracking. He is larger than all the others- wet measurements were 23 inches tall, 20 inches long & 14 inches wide. I was afraid that if I glazed him up & put him in the Soda Kiln, he'd just crack up like # 3. Actually I am very certain of this. He'll be in storage over winter break until I decide whether to go for it & begin to learn about post- production crack repair, or maybe leave him in the bisqued state & do some sort of "cold surface" treatment like painting and/or staining.
In other clay news, our Community College Clay Club Sale was a success! We had some 39 clay students that participated & brought in just over $14,000 in combined sales! 40% goes to the clay club (for things like advertising, bringing in outside artists for demos, rebuilding of the beloved soda kiln & so forth,) 60% to individual artists. Below is my table of... you guessed it...  pots & bears.
:)


 While I myself did not get rich, (ha ha) I did bring in about $680 which would translate to about $400 after 40% to the clay club... which, considering it was my first sale~  was not at all bad. Although the hours were long (about 11 hours each day for 2 days,) & I was quite exhausted by the end... I think overall it was a good experience- it provided some exposure for my art, and it was fun to be a part of this larger clay community event. (It also generated some post sale sales from co- workers, which is awesome!) Special thanks to my instructors & the Clay Clubbers for putting on this event... there's a lot that goes on behind the scenes to make it all happen, and thanks to all who stopped by to say hello & purchase a pot & a bear or two!
I've just finished for the semester & am back to working full time through the holidays AND I'll be moving yet again... so I don't know if I'll be blogging much for a while... though I'll try to get out w/ my camera for an evening walk or two... I love all the lights & farolitos up around town this time of year. I promise to share if I do. 
:)
Happy December! May it be a peaceful one.
:) 


Sunday, November 25, 2012

The Beast!!!


While certainly not my best work, "The Beast" has made it out of the kiln intact, and since I put so much time into it I thought I'd go ahead & post the process. While the other bears in the Polar Series had been large hollow coiled pieces... our assignment for class was to build a solid project & then hollow it out. I had done that before with smaller pieces... say with maybe 3 pounds of clay... so I thought "No Problema!" And, since I'm  always up for a challenge, (ha!) when our instructor gave us guidelines of 25-100 pounds of clay... I chose 100. I had no idea what I was getting myself into.


Let me begin by saying that simply trying to mash together 100 pounds of clay (four 25# bags) proved to be quite a challenge, let alone trying to manipulate that much weight into anything resembling a Polar Bear. Above is my rough start, which took most of the day to achieve.


Then came the hollowing process. I took a wire & cut it in half... I suppose I was a little impatient... I really needed to let it set up a bit more first.


The hollowing process was a royal pain in the butt & I just could not figure out why anyone would want to work this way! (To illustrate this point- everyone else in class did the project with 25# of clay... only one other woman chose to go for 100# as I did... and she got so frustrated that she abandoned the project!) As you can see above, the head fell off because the clay was still a bit too soft to be hollowed at that stage. Ooops~ learning curve strikes again!


At any rate, I slipped & scored, put it back together & began building the head.


After many hours, I got to the stage you see above. Only problem was that it felt as if it still weighed a ton, thus would take forever to dry, so I set about trying to thin down the walls a bit from the inside.


Thinking I had done a pretty decent job, I made some slabs & sealed off the feet & flipped it upside right again. But it was still too heavy!!! Aarrrrgh!!
At that point, I decided to carve into it to take off some weight. I carved & carved, trying to be careful not to carve so much that I broke through... which I did. I was far too frustrated to take pictures at that stage, but basically, I then needed to cut a fist sized hole in the abdomen so I could fit my hand in, so as to do the repairs from the inside out. After what seemed like a gazillion hours later, I got to the stage you see below & called it good enough!


It took a couple of weeks to dry... made it through the bisque just fine & I glazed it up with the same glaze formula from the polar series. This time the glaze came out way different than the others... I think in part due to uneven glazing & not enough glaze. I could try reglazing & re-firing, but I am just not crazy enough about him to put forth any more effort!


Poor little guy... he looks a little sad in this pic, no?
Here are a few more views~


Soda Fired Polar Bear Sculpture
Dimensions: H: 12" W: 11"  L: 20"

Looking at the dimensions, this one is a fair amount smaller than the others in the series~ even though I started with so much more clay!

*In other clay news- I'm totally looking forward to tomorrow... I've got another big bear coming out of the kiln (I hope it didn't crack!!) & will post if it comes out o.k. I am also excited to announce that I'll be participating in my first ever ceramics sale at the community college here in Santa Fe next week!


I'd love to see you, so be sure to stop by & say hi if you're in town... and wish me luck!!
:)
