Let the Beauty of what you Love be what you Do...
~Rumi
Showing posts with label firing. Show all posts

Wednesday, March 20, 2013

First Results of the Spring Semester!

Just got my first results of the semester out of the kiln~ YAY! Though I've been working obsessively in the studio for the past 2 months, it takes awhile to see the results. While I am fine with that, & have developed some level of patience with the process, it has been a struggle to explain this process to my Studio Practice instructor. You see, in order to have the studio space, I must take the "Studio Practice" Class, which is a combo of all artistic disciplines, including drawing, painting, printmaking & sculpture. While some students in my class can work for a few hours & have a "finished piece of artwork," my pieces take 15- 25 hours to build. Then, assuming there is no cracking in the initial drying phase (which, if you recall, I am drying very slowly over 2-3 weeks, in hopes of alleviating the cracking issues I had when going larger last semester) the pieces must be bisqued, which, depending on how full the kilns are, can take another week. My glaze must be mixed, sprayed on meticulously in the spray booth, wadding applied so the piece won't adhere to the shelf... then comes the wait in line to fire the pieces.


Our soda kiln is small, and there are somewhere around 7 or so classes that are putting work in it. I took the photo above to show my Studio Practice instructor the size of the kiln in relation to my work. Due to the size of my pieces in relation to others, and the space they take up in the kiln, my work was bumped back several firings. While I understand this, despite my best efforts to explain the ceramic process to my non-ceramic instructor, it was indicated that excuses were being made as to why the ceramics students did not have finished work to show. Now, knowing me & my ceramic obsession... don't you think I want to see finished work as well?? Of course! But I can appreciate the process, and all the factors involved in ceramics, (especially the firing) that as a student, are beyond my control.


Glazed work, in cue for loading.


Fully loaded kiln. I was lucky enough to get 3 pieces in this firing. You can see how much space they take up! In addition to all the time- consuming factors listed above, it must be noted that in our student clay community, we all pitch in & help out.  That means that  loading & unloading kilns is part of the process... which I think is great, but this takes time as well. There are so many considerations to take into account when working in clay... and I feel that to compare the processes in clay to other artistic processes in the student setting is like comparing apples to oranges. But, if any of us are to have our own studio one day, learning the in's & out's of the entire process is  both beneficial & essential. 
Anyhow, drum roll please... 
my long awaited Finished Work!!
:)


#1 New Mexico Super Sculpt Cone 10 Clay Body; Soda Fired to Cone 11
Satin Mint Modified Glaze
Dimensions~ H: 16.5"  W:16"  L 16"

As you may recall, my goals for this semester were to complete a series of 10 or so bears, testing a variety of different sculptural clay bodies, to see which I liked working with, which held up to the firing in the Soda Kiln without cracking issues, and how my particular glaze worked with these bodies. (Essentially, these are large scale test tiles!) I was thrilled with the results!! Firstly, no cracking!! Yay! Secondly, while the glaze turned out quite a bit differently on these clay bodies as I was sure they would, I was quite excited about the effects on each. 
:)


While no crystallization occurred on this piece, I am still quite in love with this glaze I find the variation of color nothing short of astounding!
(Click to enlarge on any photo to see glaze detail.)


While the goal of some ceramicists is to attain fairly predictable results, I am loving the uncertainty and different effects attained by testing different clay bodies with the same glaze to see how they react to the atmosphere in the soda kiln. I love the light rose colored tones in this one, which occurred on the back & neck of this piece.
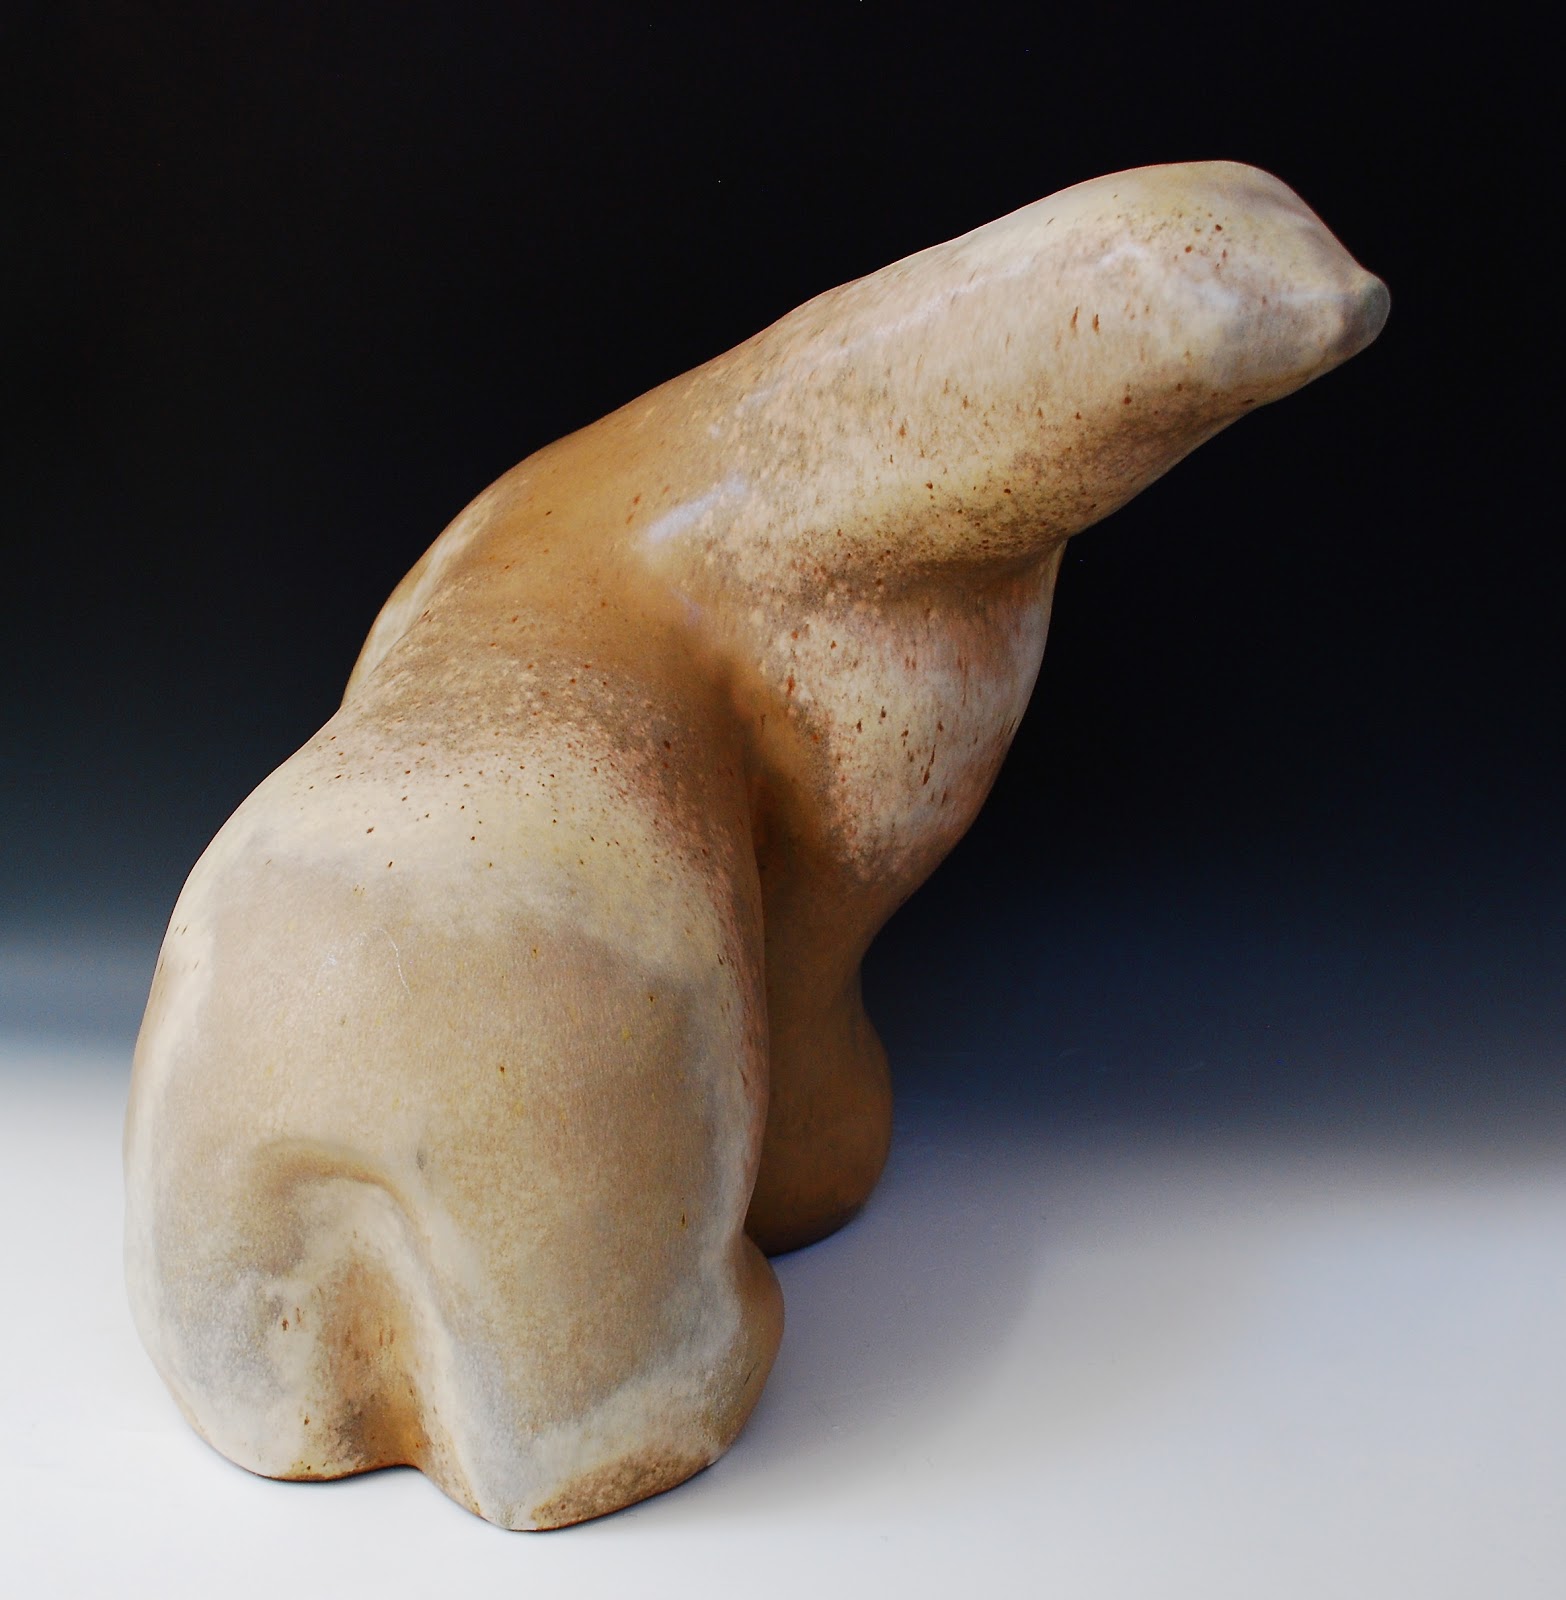

Below is piece # 2. Just a touch of crystallization on the nose & different reactions with the clay body create a totally different effect. I like the inquisitive posture on this one.

# 2 Laguna Sculpture Cone 10 Clay Body; Soda Fired to Cone 11
Satin Mint Modified Glaze
Dimensions~ H: 16"  W: 17" L: 17.5"

Another view~


The piece below was actually built last semester. It was the largest one I had done with the Ann's Soda clay body... I was afraid to fire it as my larger pieces w/ that particular clay body had been cracking in the kiln, but I decided to go for it.  While some cracking did occur on this piece, it was fairly minimal. It was too tall to fit on my photo background paper, so please excuse the amateur photography on the finished piece.

Ann's Soda Cone 10 Clay Body; Soda Fired to Cone 11
Satin Mint Modified Glaze
Dimensions~ H: 21" W: 15" L: 17.5 "

Again, I am in glaze-amazement. The effects turned out much more subtle in this piece. the surface is very stone-like, in person it has the feel of smooth walls of granite.


 Above & below~ a few more views. 


I've dubbed this one "The Guardian." He's much taller than the others (close to 2 feet) & has a presence/feel as if he is watching over them.


Above is our glaze room & spray booth. Just before spring break, I got 2 more pieces glazed, so that hopefully I be able to load them up as soon as classes start up again.


I also finished # 7 above, and # 8 below. Having built 6 bears w/ a variety of different clay bodies, I returned to the Ann's Soda on these two.


And lastly, my messy studio just before campus closed for the week~ I'm running out of space!


My reflections on my coursework thus far this semester are positive, despite the ongoing struggles with the Studio Practice class. While I don't feel I am learning much from the actual class, I am learning a lot by working independently in the studio, testing clay bodies & by creating a cohesive body of work.
✫☼✫
Hopefully I'll have more work to post in the upcoming weeks, but in the meantime...
Wishing you all a very Happy Spring Season!!


Monday, March 19, 2012

Clay Updates...

Well, I'm officially on spring break for the semester... and I have to admit, it's nice to have a little down time.  Here's a little bit of what I've been up to in my clay classes~ last week in glaze calc we did tests via Triaxials, vs. the line blends we had been doing up until this point.


You start by mixing up a base glaze (I chose Satin Mint Green~ which in the glaze books looks a very pale green w/ some light caramel undertones~ I'm hoping to make a nice glaze for some projects I'm working on...) then you divide the glaze into 3 buckets- A, B, & C. A is your base glaze, and to C & B buckets, you add a percentage of other colors.


You then measure out in various percentages from each bucket to create 21 different variations & dip the tiles to test. Exciting stuff, no? 
Looking forward to seeing the results once they're fired, which should be some time next week.


Also still working on my throwing skills! Inconsistent, yes, but perhaps a bit better.


Trimming bowls, throwing cylinders, putting handles on mugs.
Also got about 6 pieces out of the kiln last week. About 1/2 were total junkers... but these combos I found interesting.


While the bowl itself is nothing special, I do love it as I used some of the glazes we mixed in glaze calc class on this one. It was from the "slop buckets," which are basically leftovers from our tests... but I had to try it on an actual piece, rather than just looking at test tiles. Kinda cool.


This one was from standard glazes we use in class. The dip on this one was a little sloppy, but I like the color combo, and I have to admit that the "sloppiness" of the piece is growing on me as I use it.
:)


This one is funny- it's not quite a plate, & not quite a bowl... I call it a "plowl." Ha ha! Experimenting w/ dipping & sponging on glaze to form a pattern, I thought this one turned out alright.

And, last but not least... the bears! It was crazy windy & blustery yesterday- too yucky to go out for a hike, so I stayed in & made bears most of the day. I do love making those little guys. :) In other clay news, the big bear made it out of the kiln intact (Yay!) & hopefully I'll get it glazed here in the next few weeks, depending on how the glaze testing goes. But in the meantime, I think I'll be taking a little well deserved clay break.
:)

Tuesday, March 6, 2012

Where the Magic Happens...


In the kiln of course! This is a pic from loading the gas kiln last week~ note all our little test tiles from Glaze Calc Class.
:)


The test tiles above are all from the same base glaze (far left,) with various percentages of Alumina (stabilizer) added. It's interesting to see how little variations can totally change the effect of the glaze.


Everyone in class is testing different variations & percentages of colors, fluxes & stabilizers added to one of 3 favorite glaze bases that we formulated earlier in the semester. It's a lot of info to take in & talk about. We spent hours talking about the results.


Still working away in wheel throwing... filling up shelves. Thinking how taking 2 classes & working is a bit much...


generally feeling a bit behind & trying to get in the studio during my free time, though open studio hours conflict w/ my work schedule! The good news is, I'm gradually getting some things done & getting a little finished work back. Most of it was just testing glazes on the recycled clay that I'm using this semester. Some turned out just horrible! You don't get to see those~ but here are some results that I can live with.
:)


I splurged & got a sheet of background paper for photographing finished work. Surprisingly, I couldn't find it anywhere in town, but I did find it online- it was over 40 bucks w/ shipping! Also, finally got my good camera back, thank goodness! That was over 200 bucks- another unexpected expense! Such is life... you all know how that goes.
Well, gotta run... studying The Complete Guide to High Fire Glazes to pick a glaze to test on Wednesday & gotta get in the studio to do a bit of glazing for my wheel class before the next firing!
:)

Saturday, May 7, 2011

It's All About the Slip!

Well, it's also about the building of the pot, the scraping, the sanding, the burnishing, the bisque & finally the pit fire! But the application of micaceous slip (mica rich clay + water)
is what gives the pot that earthy sparkling glow. (Yes, that's right- I'm slathering my mud pots with.... mud!) Looks delicious, doesn't it?
:)


I've had a very busy week of scraping & sanding pots, now that the winds have been cooperating a bit & I've had some extra time to get in the studio. No pics of sanding this time... so just picture Pig Pen with a cloud of dust swirling around his head & you'll get the idea! I had quite a backlog of work to get done, since I've done the various assignments for class, but have also managed to squeeze in a few extra pieces here & there. So here's what I've been up to!
The pic below shows the slip applied to the outer portion of the pot. Once it is stone burnished & dry, the inside will be done.


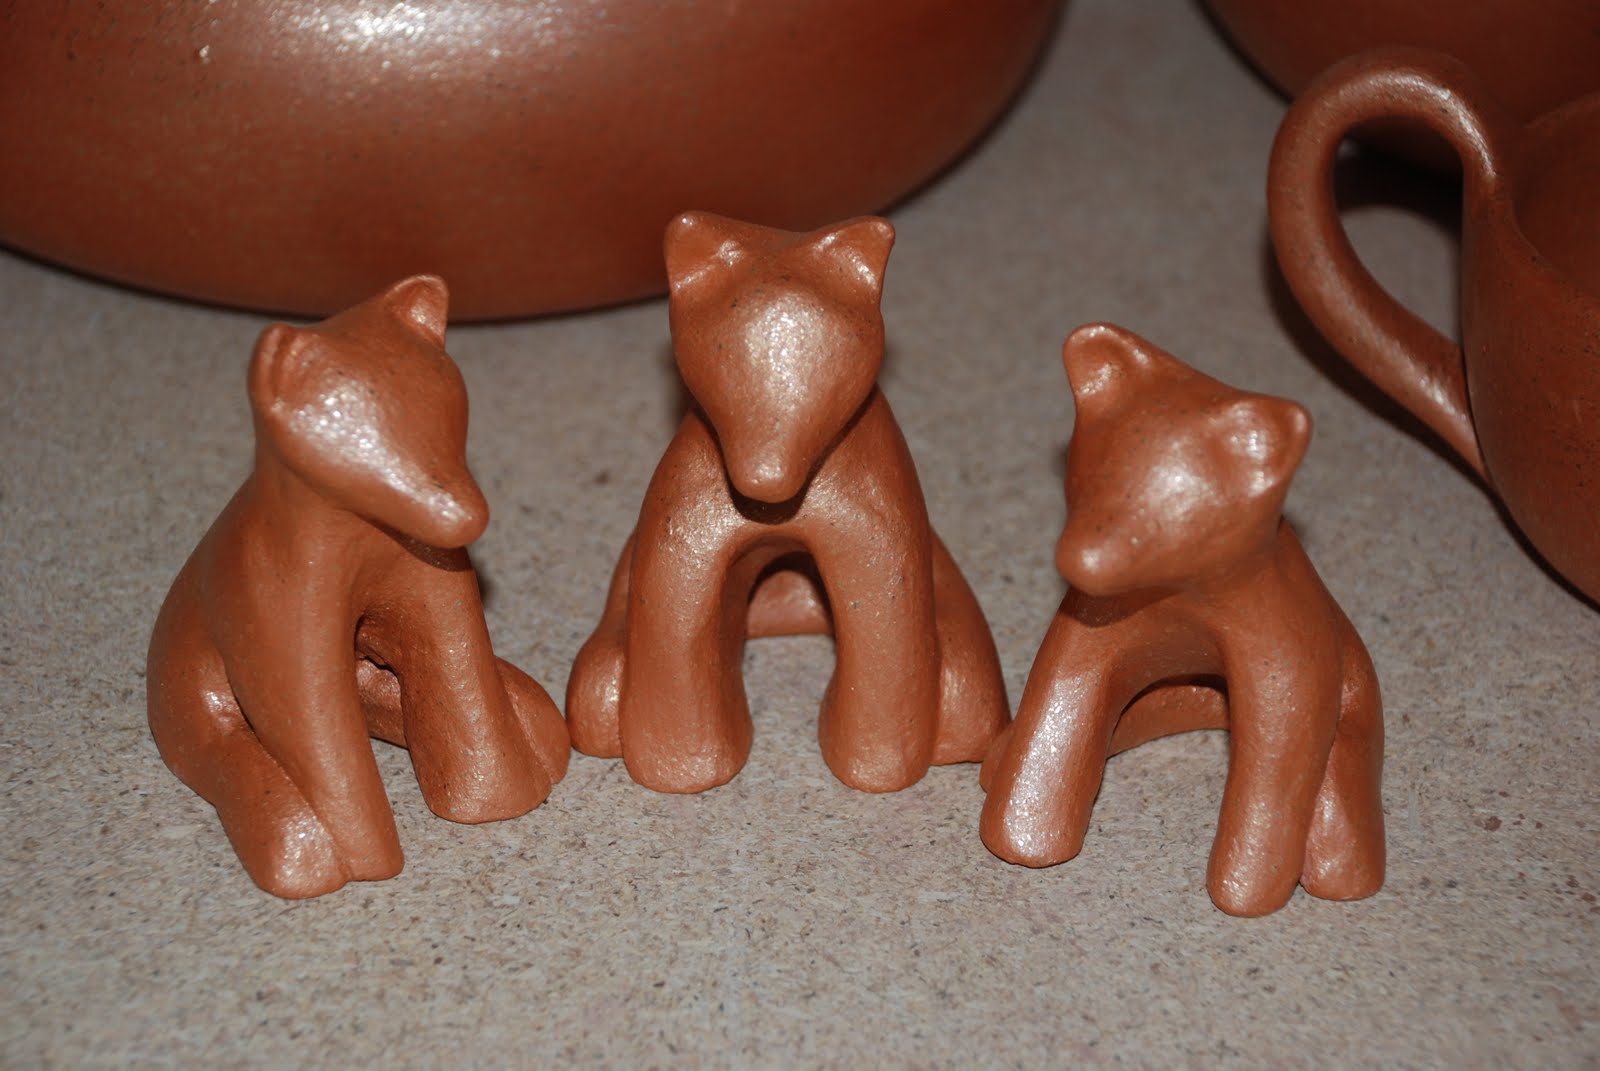
Yesterday, I slipped & burnished the 3 wolf pups, 2 small dishes, a large salad bowl, a mug & a bean pot! Whew! You can see the difference in color once the slip is applied. Those went into the kiln yesterday afternoon.


This morning I went in to unload the bisqued pots~ it was pretty fun to see the change in color to deep orange. They will change again once they are pit-fired... the bright orange will tone down, and smoke clouds will be fired in (see pots in sidebar.) The pit fire was scheduled for 2 weeks from now, but has been cancelled. Due to our lack of precipitation this winter, and fire hazards due to said lack of precip + winds, it has been postponed until we don't know when. (I am thinking of other options... perhaps transporting them with me to San Diego this summer & having a big pot-firing beach bonfire?)
:)


You may have guessed the one in the center is mine if you saw the pot on the sidebar. While they are a bit of a pain to slip & burnish, I do like the fluted rim.
:)


One of my favorites was this little "mini bean pot."  It's about the size of a softball & I think it is quite cute.


And of course, the 3 little wolf pups. I love them & have titled them "Good Things Come in Threes."  There is a chance that we may be able to smoke fire a few pieces of our work in the Raku kiln (it's apparently out for repairs or something) and if we do, it will turn the pieces a very cool shimmery black. I hope to do the wolf pups this way.


Here are all my pieces that came out of the kiln today. Overall I was quite happy with them, though I have to admit, I am my own worst critic & upon close inspection, I could find a few flaws... but no matter, I am learning!
:)


 I also finished a couple bowls today, as well as the Bear Pot~


Maintaining a good fit on the lid from wet to dry to sanding is tough! It's not perfect, but I think I quite like it anyhow! It'll go in the kiln next week.
:) 


I've included this pic as it really shows the transformation that occurs during the process. To the right- unfinished "rough" pots, in the back- the sanded, slipped & burnished bear pot, and of course the bisqued pots on the left. Unfortunately, I won't be able to show you the actual finished pieces until I don't know when, but rest assured I will post them at some point! :) Until then, I've gotten some work out of the kiln from my other class that I have not gotten around to photographing & posting yet... so coming soon~
"The Good, The Bad & The Ugly..."
stay tuned!
:)